
Brett had indicated an interest in ASL (Starter Kit) when I’d been playing a couple of weeks ago, and discovering him this afternoon with nothing else to do, I suggested a game. He happily accepted. Thus began one of the more lopsided games in my experience. It’s the game a moderately experienced player has against a complete newbie – not only to ASL, but to wargames in general.
Brett chose to play the Germans. The scenario is a tricky one: the Germans need to get about six squads from one side of the map to the other side. For a couple of moments I thought this was over the longest part of the board rather than short part; thankfully Brett set me straight, though I would have eventually worked it out given the set-up instructions. Where do you place the American troops? Well, I decided to put a kill-stack in the middle of the map with good views to the open areas of the board (a good leader, a heavy machine-gun and a light machine-gun), and put a few squads in the woods and buildings towards the edges of each map, with the two flamethrower units guarding the woods. Eventually, this is the set-up I adopted:
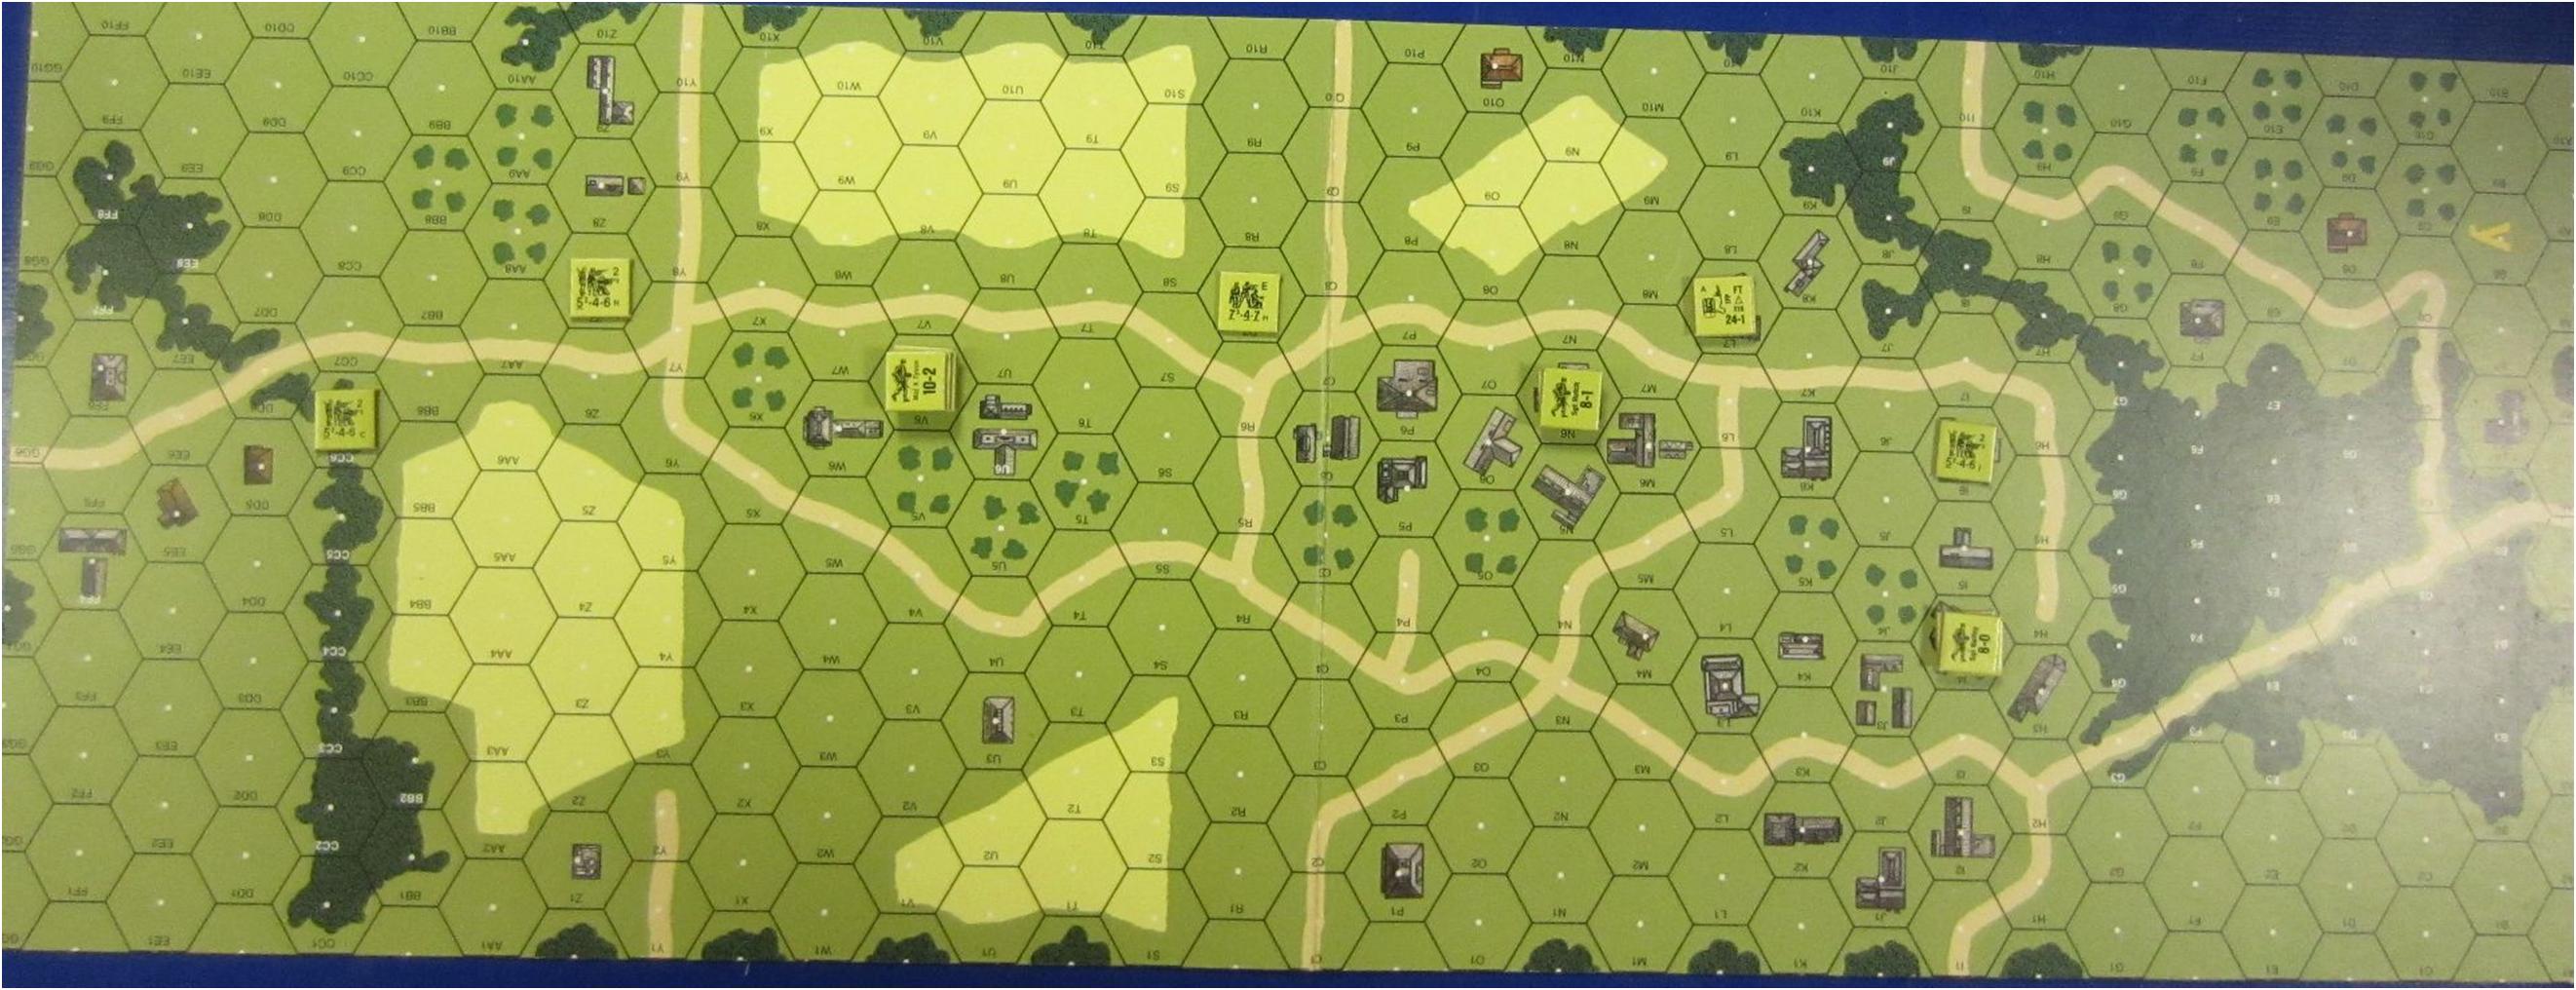
The experienced leader (10-2) is on top of the kill-stack in V6. All in all, if I were playing this scenario as the Germans, I’d try to sneak as many of my men down behind the woods to the right before attacking the Flamethrower troops in the buildings (the Germans need to leave between the roads on the bottom of the map). Brett had a different strategy: a lot of troops, most of which would be entering near my kill-stack and then trying to overwhelm my forces by force majeure.
One problem: moving in open ground in ASL is deadly. Moving is, by itself, troublesome. Moving in stacks is worse, but moving in stacks in open ground will leave a lot of units broken or dead.
Here’s how the map kill-zone looked as the movement phase ended:
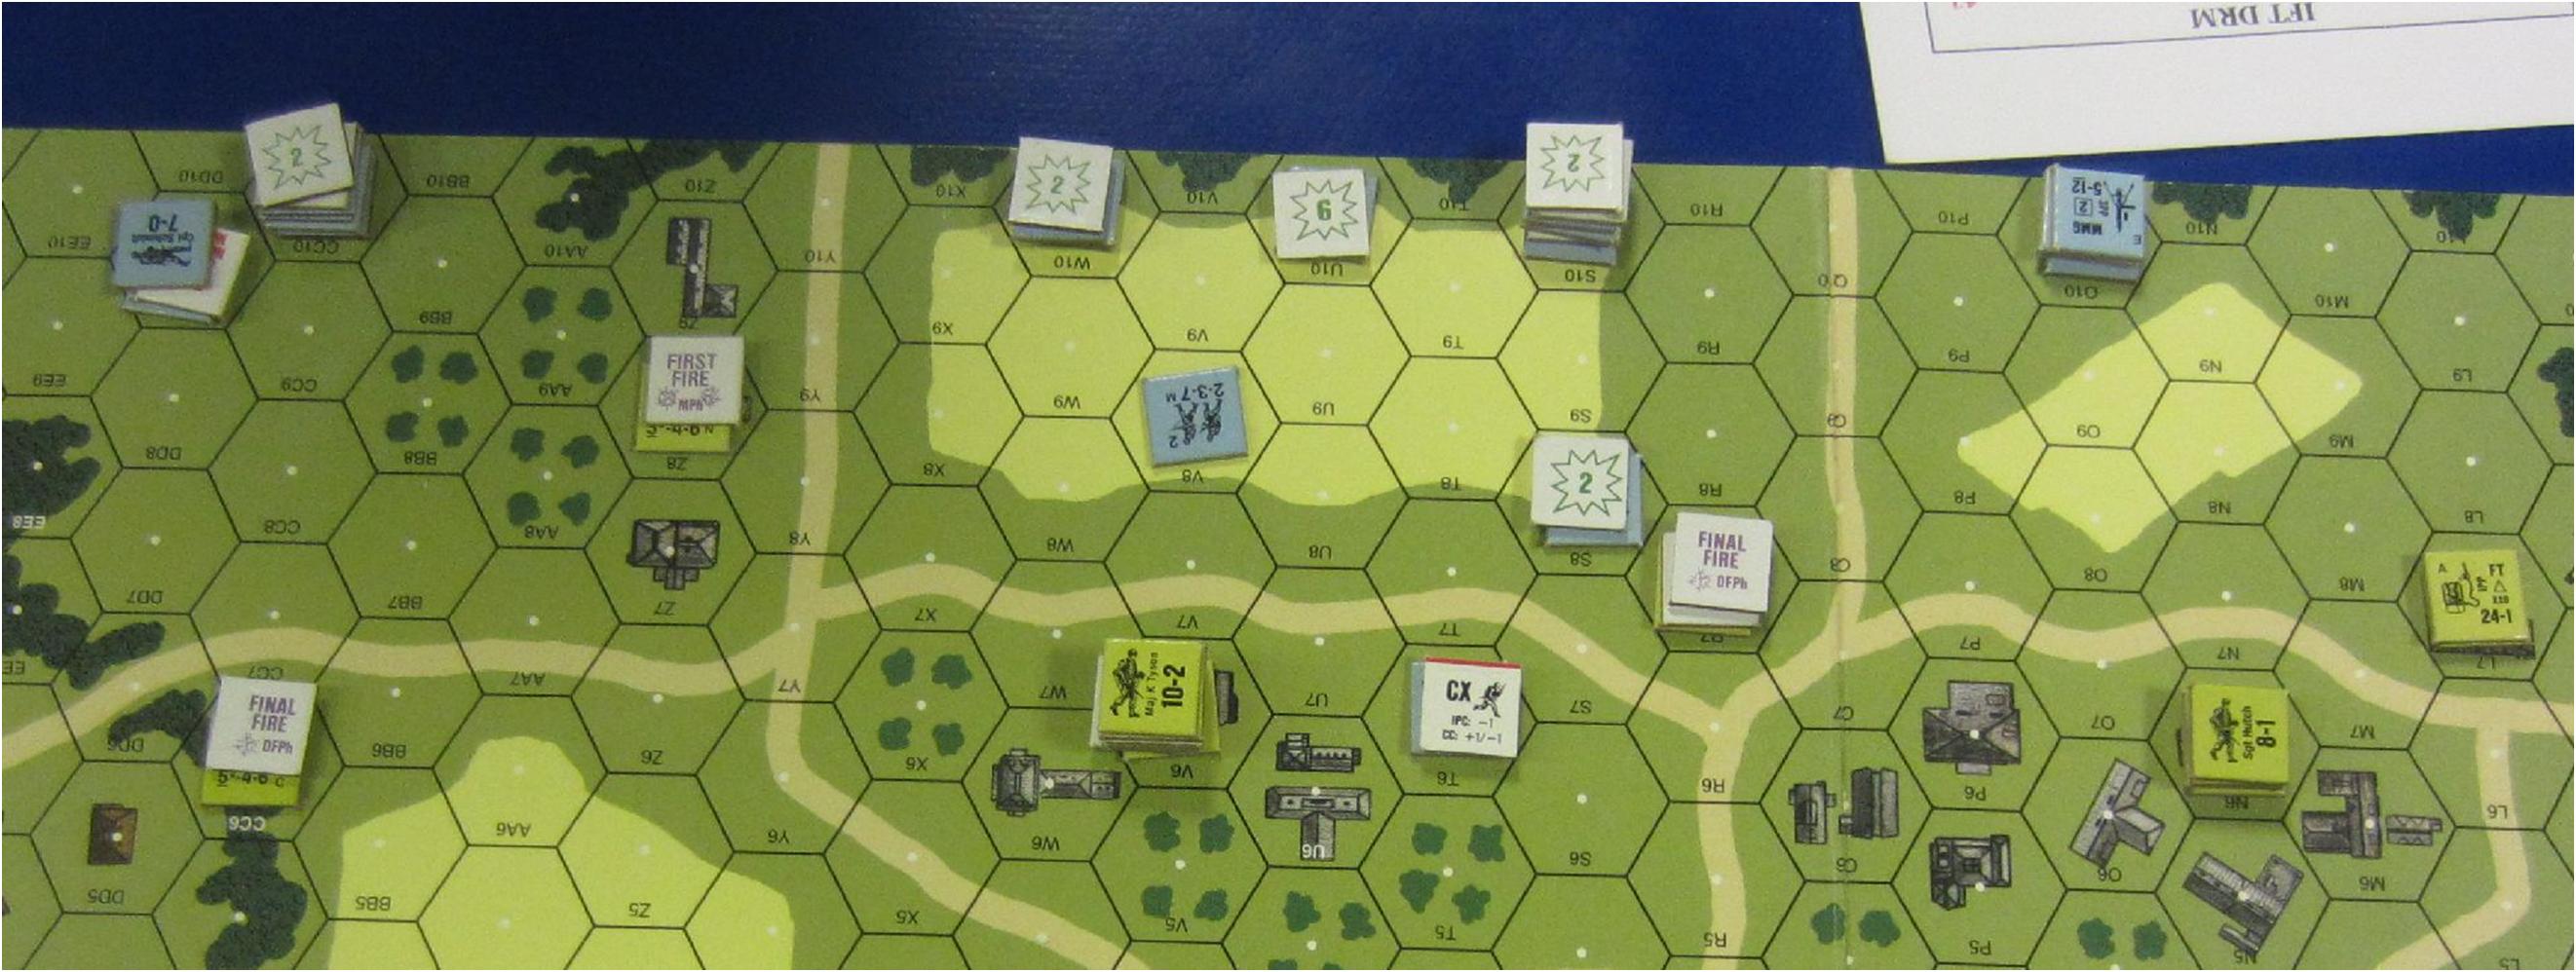
Under those residual fire markers are a lot of broken troops. Brett had a bit more luck with the units he was bringing down on the far-right side behind the woods – they made it onto the road, but my defensive fire was now able to break or eliminate the remaining units in the open around my troops. Retaining rate-of-fire with my MG kill-stack just made things better. Well, for me, not for Brett.
We played through my ATTACKER turn just so Brett could get some idea of how the turn structure worked, but the additional firing just left fewer of Brett’s troops on the boards. There was no reason to continue with the slaughter, so we reset for another attempt at the scenario; one where Brett would (with any luck) try a less-doomed strategy.
Here’s how the map looked when we called it:
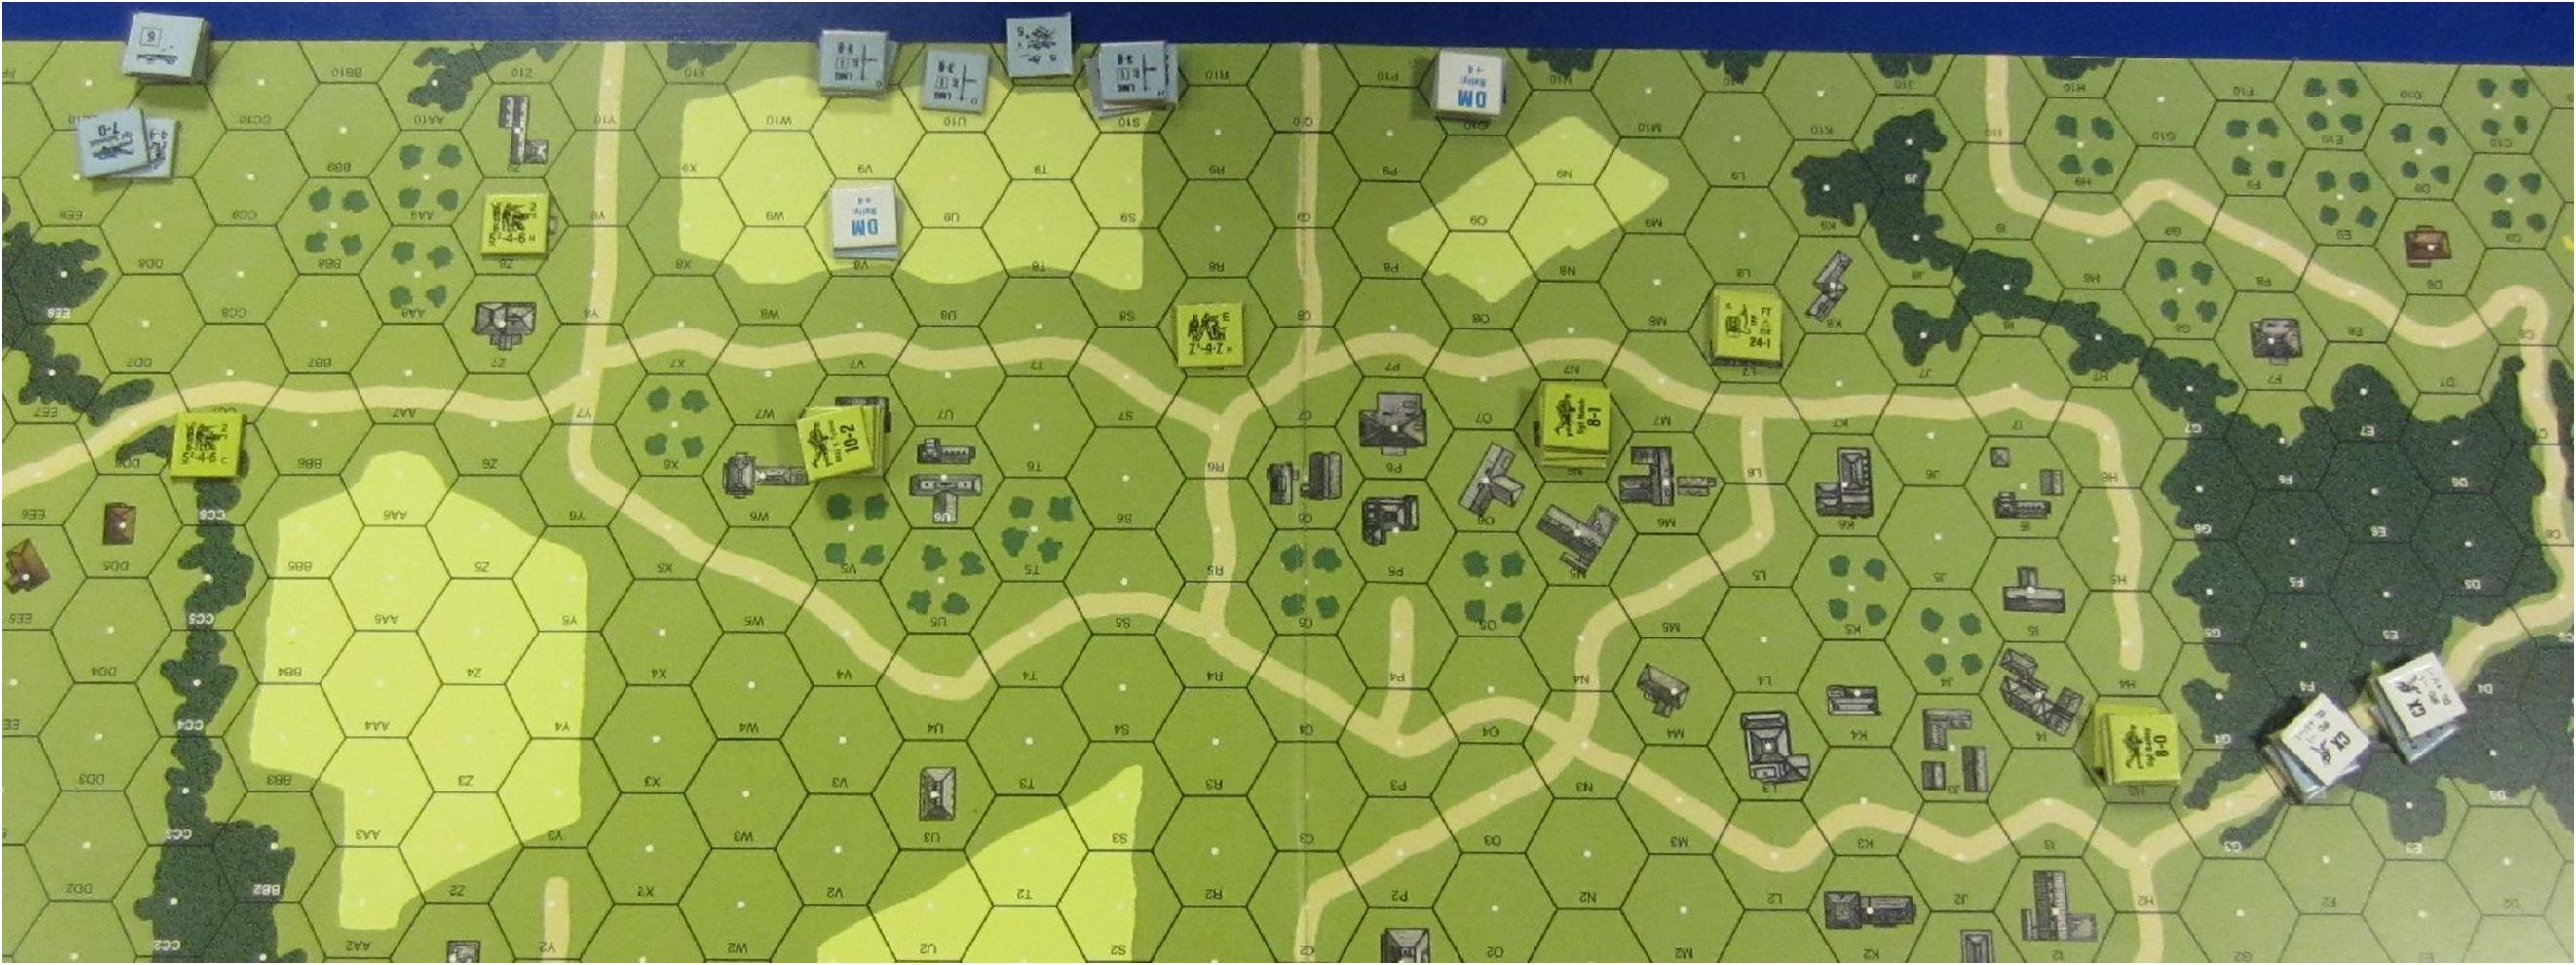
I’d lost no troops, Brett had lost significant numbers. Brett noted that I’d had about three opportunities to shoot his troops to his one. That may not be that inaccurate a description, but the moral of the story is this: Don’t move troops in the open if you can avoid it! And certainly not when there’s a heavy machine gun wanting to take you down!