
The third scenario in Squad Leader does an interesting trick: it takes the first two scenarios (The Guards Counterattack and The Tractor Works) and puts them together, depicting a rather busy day in the fighting for Stalingrad. Indeed, it’s a very crowded map when set-up, with the Russians having a total of 60 squads on the board!
Squad Leader uses a system of teaching the rules known as Programmed Instruction: each scenario adds a few new rules to the game. The Streets of Stalingrad in fact has three variants, each one adding more complexity. For this play, I was using the first variant, which adds Sewer Movement. This allows Russian squads with a leader to move from house to house without using the street – as it turned out, rarely necessary, though I did use it from time to time. The second variant (which I’ll skip) adds in the first Armoured Fighting Vehicles – tanks. The third variant uses both together, and I’ll give that a try in the near future. The tank rules take up a couple of pages of the rulebook; although I’m familiar with the concept from Advanced Squad Leader, this is the first attempt at them, and they differ from the later rules in several key respects. I probably could have used them, but I was curious to see how the scenario played out without them.
Here’s how the board looked after I set it up:
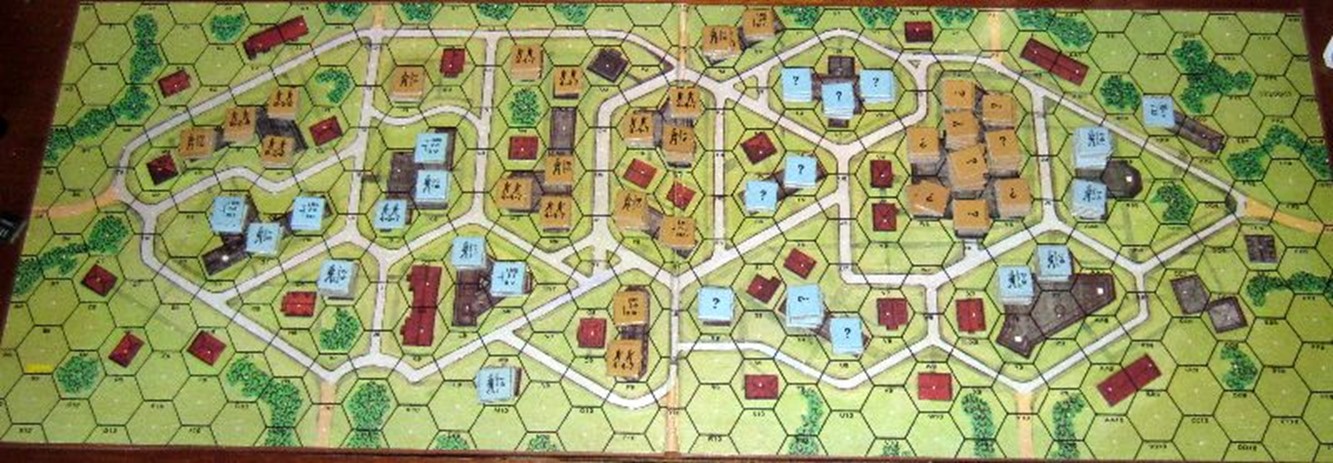
This is, I want to stress, not the optimum way to set it up – there are some pretty exposed German positions on the left-hand side. What makes this scenario so interesting is that it takes a scenario where the Russians are attacking (The Guards Counterattack) and a scenario where the Germans are attacking (The Tractor Works) and then lets them at it – to win, you need to satisfy both victory conditions. So, there would be a lot of action all across the board – with the central units trying desperately to keep two actions apart, so the winners of one couldn’t come to help with the other conflict if it was still unresolved.
Who goes first? That came down to a die-roll, which the Russians won. The Russians would go first this scenario. This left the defenders of the Tractor Works (the big building on the right) with a difficult decision: did they break their concealment to engage the Germans? A couple of them did, the others remained concealed against the wrath of the German flamethrowers. The first Russian squad to try this managed to break their machinegun, and so thought this was a pretty bad idea. And the Flamethrowers were extremely effective even against the concealed troops, so it wasn’t a good start.
However, the Russian troops in the middle did a very good job of flushing out the concealed German defenders, even as the Guards made a number of extremely ineffective attacks. All the action for the first time was concentrated on the right-hand side of the board.
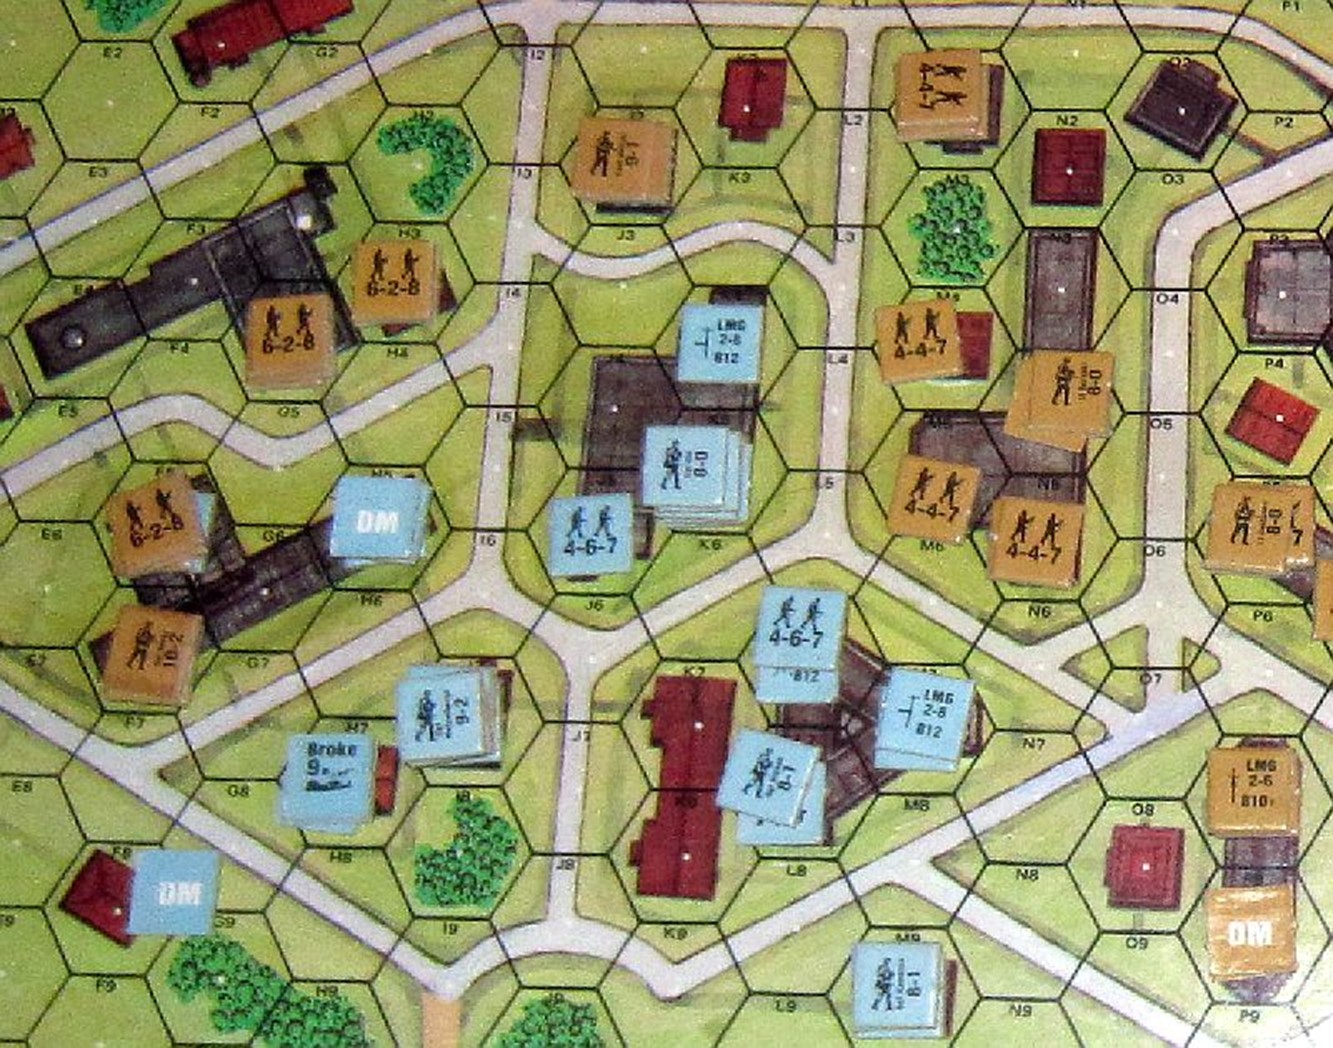
As these things go, the Germans now had their turn and had a good chance of following up their advantage with the Tractor Works. They took it, crossing the street and clearing the right-hand side of the factory. I’d placed a lot of the defenders in the centre hexes of the Tractor Works, and that now exposed the Germans to some pretty heavy fire – given the defensive fire phase and the upcoming Prep fire phase of the Russian turn, it’s not surprising many of their units then broke and ran back across the street. Across the other side of the city, the Guards began to break the German defenders – being able to make FP 18 or 36 attacks is astonishingly effective in this game, especially when many of the rolls are made at FP 4 or 6!
The Guards captured their first objective – building G6 – and the Russian defenders retreated when they could and were eliminated when they couldn’t. Elsewhere on that part of the board, with lesser firepowers available, mostly the units just took pot-shots at each other, occasionally breaking and retreating to a hex out of the line-of-fire if possible, where a leader could attempt to rally them. Having that capability was going to be important – there weren’t really that many leaders available and keeping men in the fight was going to be critical.
The German engineers used their first smoke as they crossed the street to the Factory, using it to hinder fire as they entered the most dangerous terrain in Squad Leader: Open Ground. How dangerous is open ground? Consider this, all attacks are made by rolling 2d6 and comparing the result to a table with various firepowers. If the defender is in a stone building, they add 3 to the roll. If the defender is moving in open ground, they subtract 2 from the roll. That’s a difference of 5 in the roll, and given that an attack by two normal squads requires an 8 or less on the dice to be successful, the modifier is extremely significant. Most of the Germans in this scenario, without the ability to lay smoke, wouldn’t be moving much; they’d have to neutralise the defenders first.
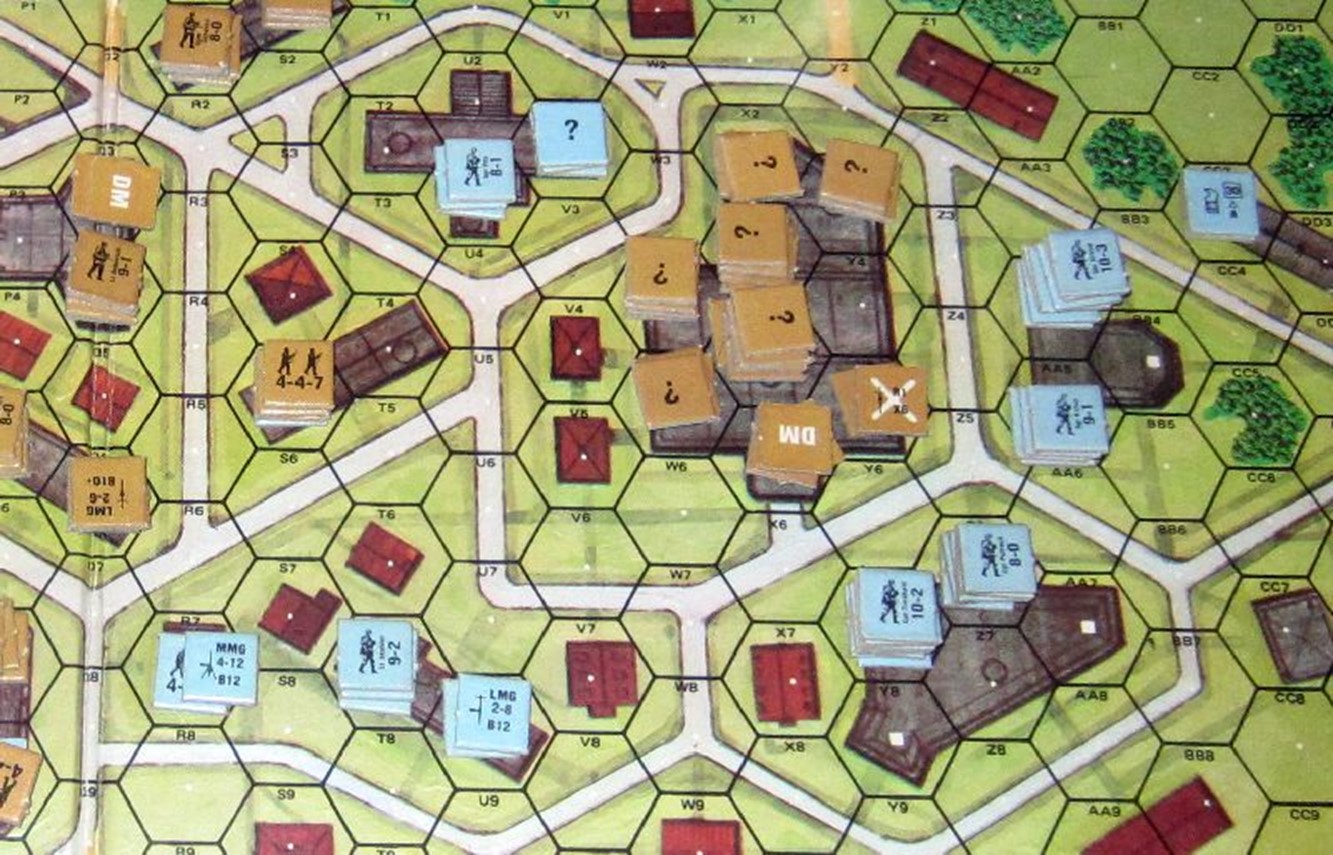
Unfortunately for them, the Russians were doing a much better job of that to the left of the Tractor Works – most of the German defenders on that side were now dead or locked up in melee, and the Russians had the squad advantage. The attack on the factory was going a lot better, with only a handful of Russian squads remaining. One of the Russians had gone berserk, but would be eliminated in the resulting melee. Due to the number of support weapons left abandoned in hexes, it’s a bit tricky to see who controls what, but at present the Germans held the upper hand – but Russian reinforcements were moving in.

Adding to the confusion of depicting this tale with photographs, the Russians were picking up abandoned German machine-guns and using them as their own. Because weapons are kept on top of the counter using them, this occasionally leads to some confusion as to which side is actually in a hex. Apologies for that! (And then there are the hexes just full of abandoned weapons from both sides…)
The Germans lost all presence in the centre of the board, they were losing it on the left, and the attack in the Tractor Works was stalled – it wasn’t looking good for them.

And, from here, it would look no better. Basically, the Russians would attack, the Germans would break and retreat, and with reinforcements flooding the Tractor Works, the Germans gave up even their toehold on the factory. By the time the final turns in the game arrived, the Germans were left with only three or four units on the right-hand side of the board: the rest of their units had been destroyed. It was a devastating victory for the Russians, and although they’d lost a lot of men doing it, they’d managed to rally enough with their leaders to keep up the pressure throughout.

In fact, when I ended the game, there was still another full turn to play out, but there was no point – the Germans didn’t have the troups to even cross the street, let along recapture the Tractor Works.
Key to the Russian’s victory was their ability to neutralise the Germans in the middle of the board; the Germans need better defensive positions and more effective counterattacks to keep reinforcements from getting to the factory. Causing more damage to the Guards on the far-left is also crucial: they’d inflicted no damage in the initial engagement, allowing the very strong units (6-2-8) to attack a lot of comparatively weaker German positions.
I’m not quite sure what will happen differently next time, but I know it won’t play the same. There are tanks for the next attempt!