
Thursday evening was a light night for boardgaming – both of my regular opponents cancelled on the day, and so I went home early. I did manage to play through one game of the Advanced Squad Leader Starter Kit though, playing through scenario S7, the first of the scenarios printed in Operations magazine. I have played this scenario before, although I can only remember how it felt to play rather than the specifics of what actually occurred.
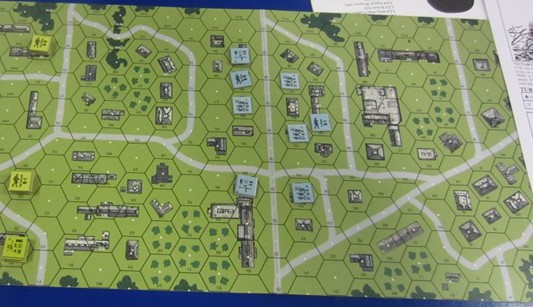
It is an unusual scenario, made so by the American victory conditions: the Americans need to capture 15 or more stone building hexes whilst not losing too many of their squads to the German defenders. Alternatively, they can just wipe out the Germans and win. Played on board z, both sides start on the map, and the Americans need to cover some ground before reaching the German positions.
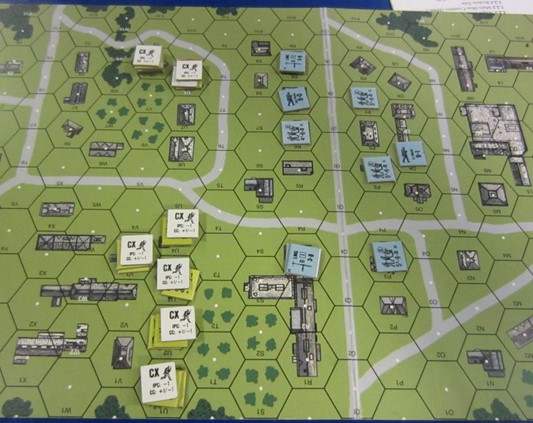
Upon showing this scenario to Mick, both of us were unsure as to who was favoured. Mick decided to play the scenario defender, the Germans. This left me with the Americans, and in turn we set up our troops. I stacked as many squads as I could under my two leaders, all the better to quickly reach the relative safety of the stone buildings just before the German lines. With only 5½ turns, I’d have to move quickly.
Mick chose to defend in a double-line, with leaders positioned to best rally his troops. I discovered in a short while that he’d made one rookie mistake: stacking his light machine-guns with this inferior troops, so instead of a single squad with LMG having a firepower of 8, it only had a FP of 7 – and thus was not so effective on the attack. When he could get his elite 5-4-8 troops in the attack as well the FP would reach 12, but would lose versatility thereby.
Using the available cover, I double-timed my way up to the buildings across the street from the Germans, advancing into my attack positions, creating a line of attackers that could create Fire Groups or fire singly depending on requirements. My leaders hung back, in positions where my squads could retreat into and thus have the chance of being rallied. Mick’s defensive fire was ineffective, and soon we were shooting at each other across the orchards and streets.
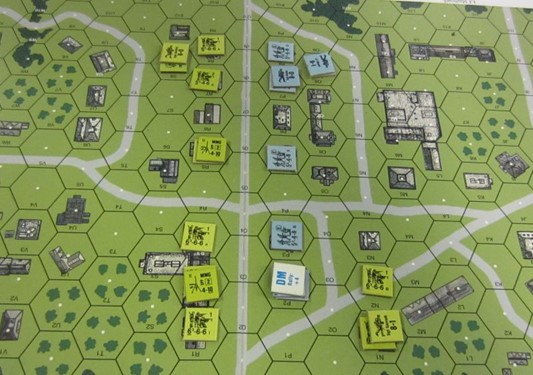
Mick’s reaction to this was fascinating: he fell back, his front line taking up a defensive position over the road that bisected the board. This ceded a number of building hexes to me, but made it much more difficult for me to breach his lines, and allowed him to group for fire groups more effectively.
His troops broke one of my units as it reached the large building (R2), and it retreated to my 8-1 leader which was sitting in S3, out of the line-of-fire. I also placed my MMG squad in U4, a little way back from the main battle, in a position which I thought would allow it lines-of-fire to both sides of the conflict, in particular buildings P3 and P5, but strangely the measurement of these firing lines proved that they were hitting the corners of other buildings and were blocked – I wasted two turns learning this, and the MMG would eventually break when I made the second attack. That was not one of my finer moments!
I also gained a broken troop as one squad tried to advance around the bottom of the lines – it retreated back to the woods, out of the way. My broken squad with the leader rallied, and Mick completed his withdrawal, with one squad breaking in the process. The defensive line for the next part of the conflict had been drawn!

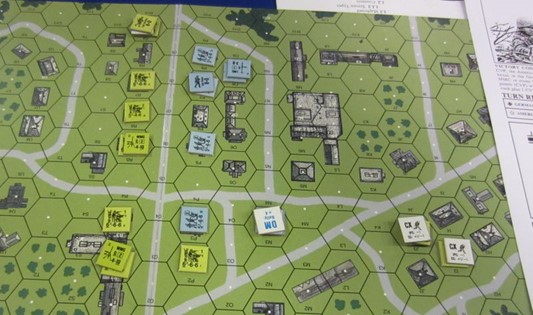
What were the Americans to do? Well, advancing their top units up to the next row of buildings seemed like a good idea, so that’s what I did, forming a FG of three hexes (17 FP); one of my units had failed an ELR morale check and now was a 5-4-6 instead of a 6-6-6; the loss of 1 FP made me very sad. My leader stood back in the previous building, waiting for further broken units to rout back.
My broken unit down the south self-rallied, and made his way around the south, using smoke to make his job easier. Mick’s rolling was not stellar – he’d get a few successes, but generally his rolls were higher rather than lower.
Mick and I both broke each other’s unit at the top, and they retreated to their leaders. Where my unit would eventually rally, Mick’s suffered at the cruel hands of Fate: two rolls of 12 in consecutive Rally phases removed it from the game.
I was finally able to break Mick’s bottom-most unit, and so – using smoke grenades – was able to get a few units around the bottom of the map to the buildings beyond. At this point, the game changed from a game of just shooting each other to one where Mick actually had to stop me… something that, with his now limited resources, would prove to be extremely difficult.
The basic problem Mick now had was that he couldn’t disengage his units without letting my other units through – giving up the first line of defense had cost him 7 building hexes of the 15 I needed, and getting through with a couple of squads with a leader gave me the ability to move very quickly. Were they going to double-time it? You bet they were!
In the end, Mick contented himself with shooting at my troops across the street – his one unit in a position to attack tried to suppress my breakthrough troops, but with no success. I was now able to roll up the buildings and get to my victory target.
I advanced into the last two hexes I needed, and started a melee in P3, and that was all the game there was: a very good win for the Americans. It’s a tricky one for the Germans to defend – they can have a really effective defensive line, but once the Americans break through, the Germans will have real trouble stopping them.
The game took us about an hour to play through.