
16th December, 1944, and the Battle of the Bulge was beginning. In Bleialf, Germany, the Americans of the 106th Infantry found themselves under attack by the 293rd Volksgrenadier regiment. They had courage, and they had anti-tank guns – not great against infantry, but perhaps enough.
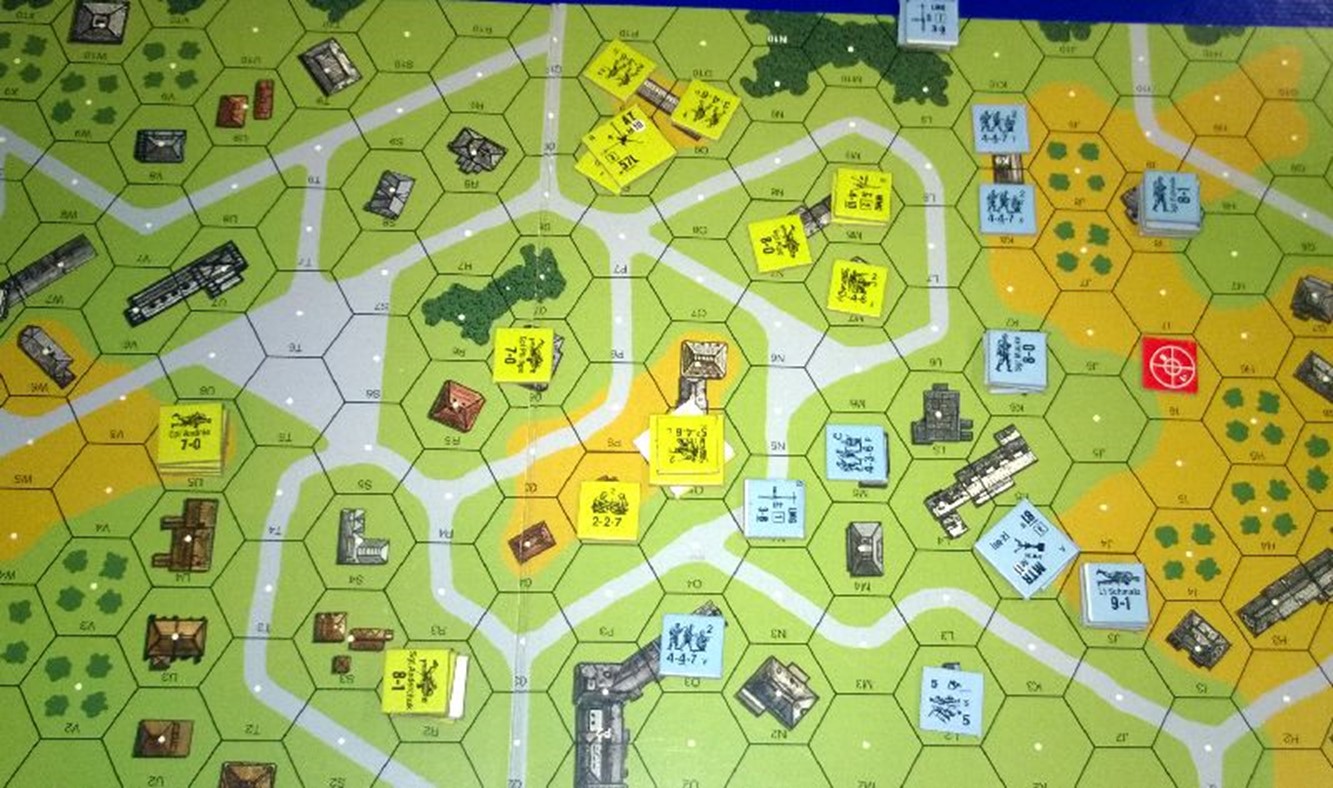
Michael and I played a scenario based on this situation the other day. Michael chose to take the part of the American defenders while I played the German attackers. We’ve played quite a few games recently where one side didn’t set up on the map, so it felt quite odd for both sides to set-up there. Michael set up both his anti-tank guns using HIP; I had a mortar, but I couldn’t see any point in using HIP, as I’d begin using it immediately. Here’s how the situation looked after set-up:
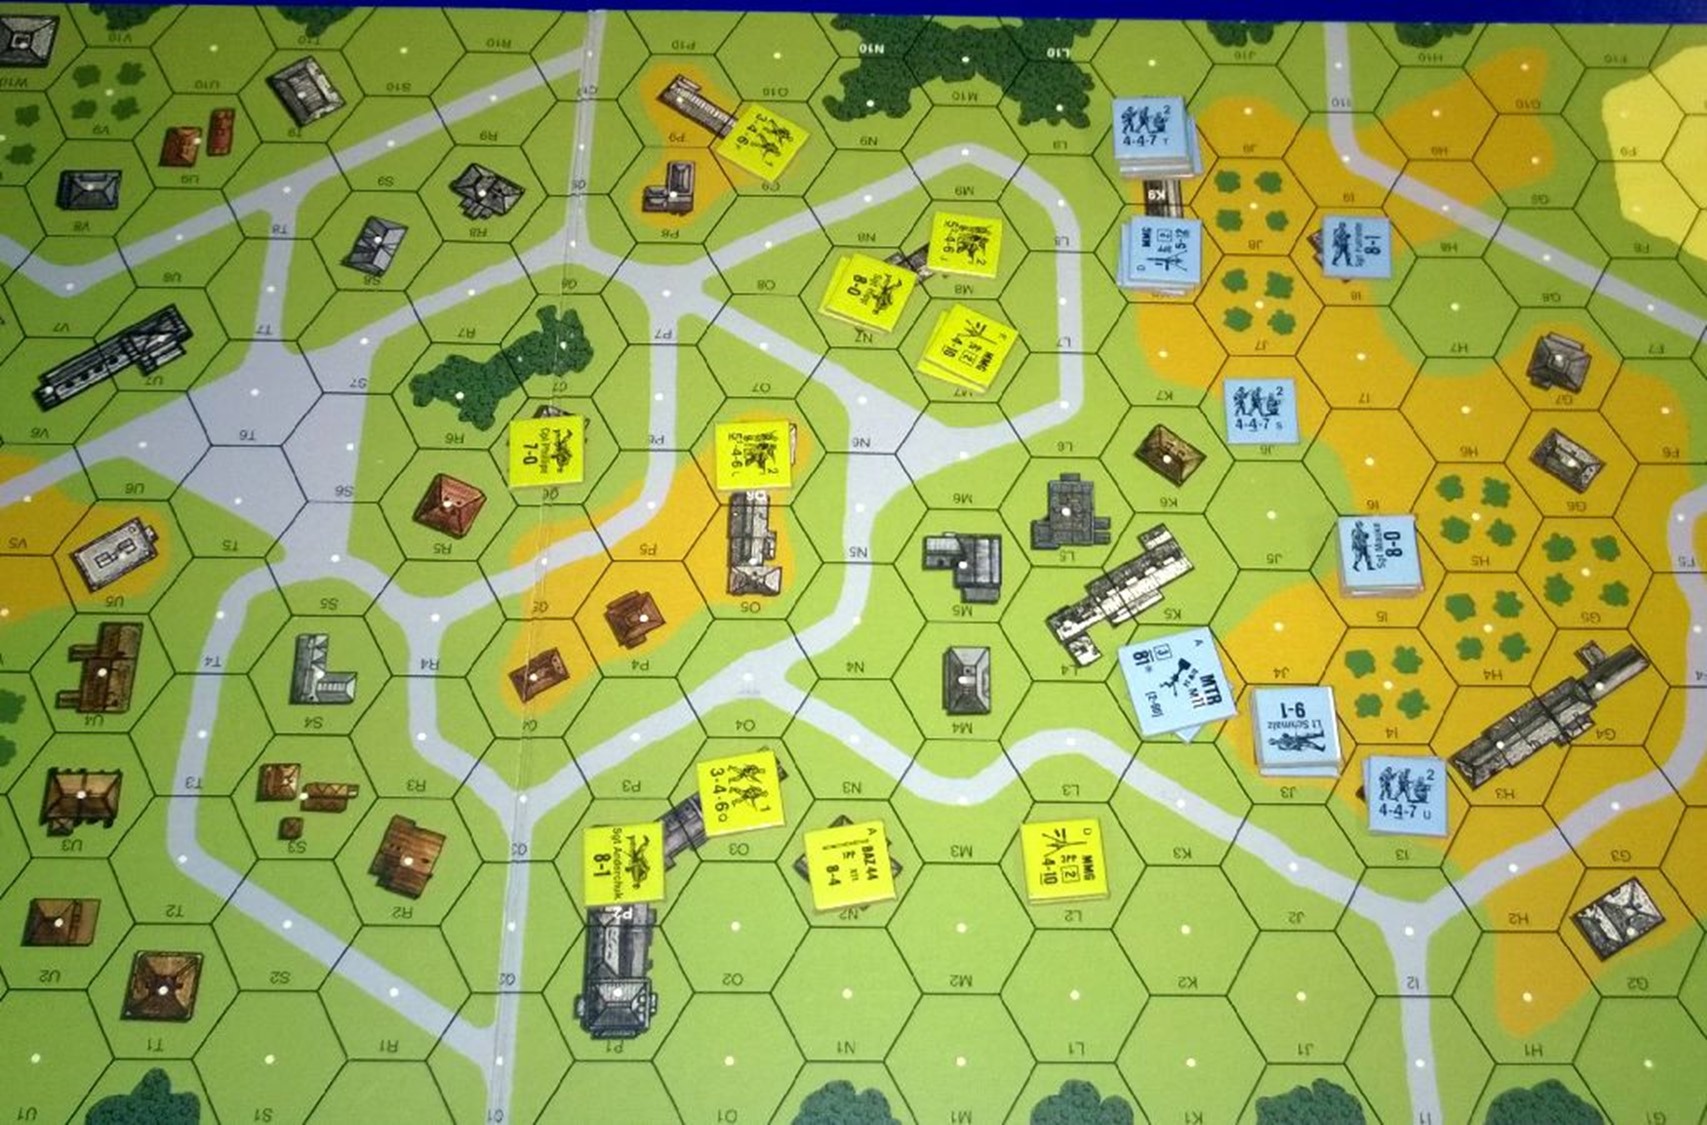
Michael, as is become customary, kept his leaders behind his main forces. His two machine-gun nests – in L2 and M7 – were potentially going to be a great problem for my troops, and I arranged them so I could quickly create fire-groups and attempt to overwhelm them with firepower. My one mortar I placed to command a view of the troops towards the bottom of the picture, hoping to be able to break through there with my troops. The victory conditions required me to make sure no American MMCs were in the buildings around the central square – within 2 hexes of S6, if I remember correctly. Michael actually began with no troops there at all, but he’d have reinforcements entering from that side later on. There’s a lot more map to the left I’m not showing in this picture, but – for the time being – it wasn’t relevant.
Can you guess where Michael set up his two anti-tank guns?
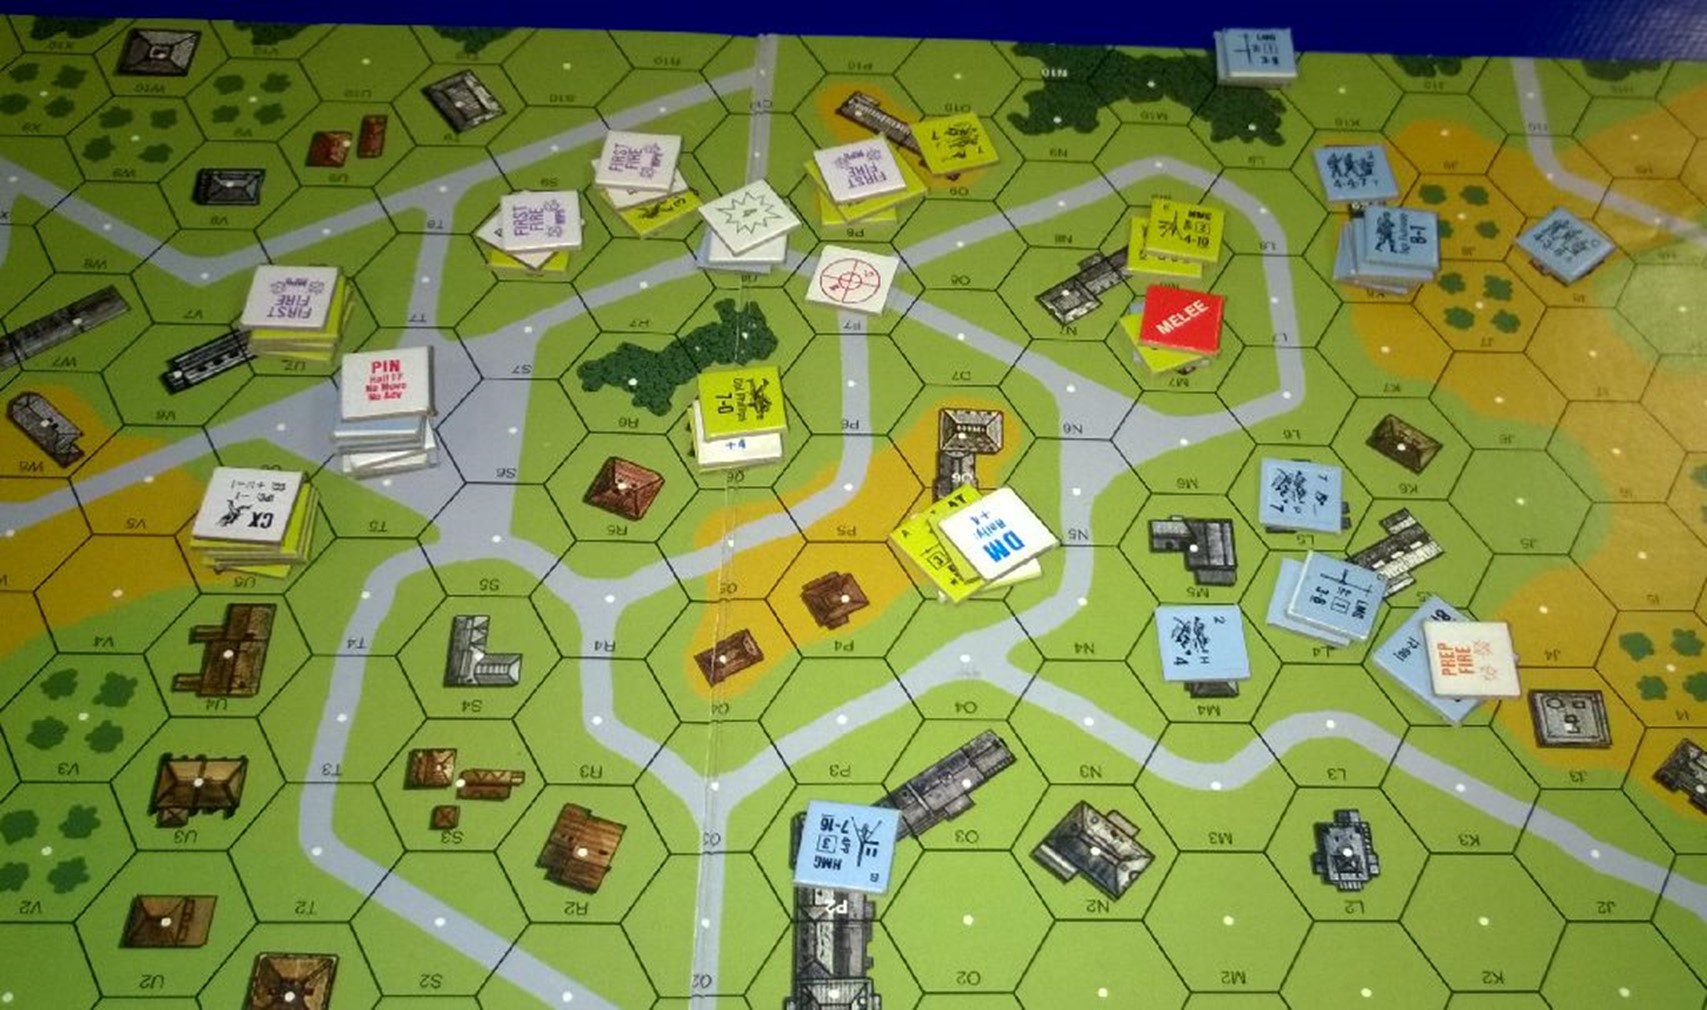
My initial push was not as successful as I would have liked. I was able to break the machine-gun post in L2, and Michael retreated his troops towards their leader, while I moved a couple of squads off the hill to follow up. However, my firing had no effect on the other machine-gun post. I aggressively moved my men into the woods above their position. I also took the central positions in the town, hoping to get some effective fire-groups against Michael’s defenders.
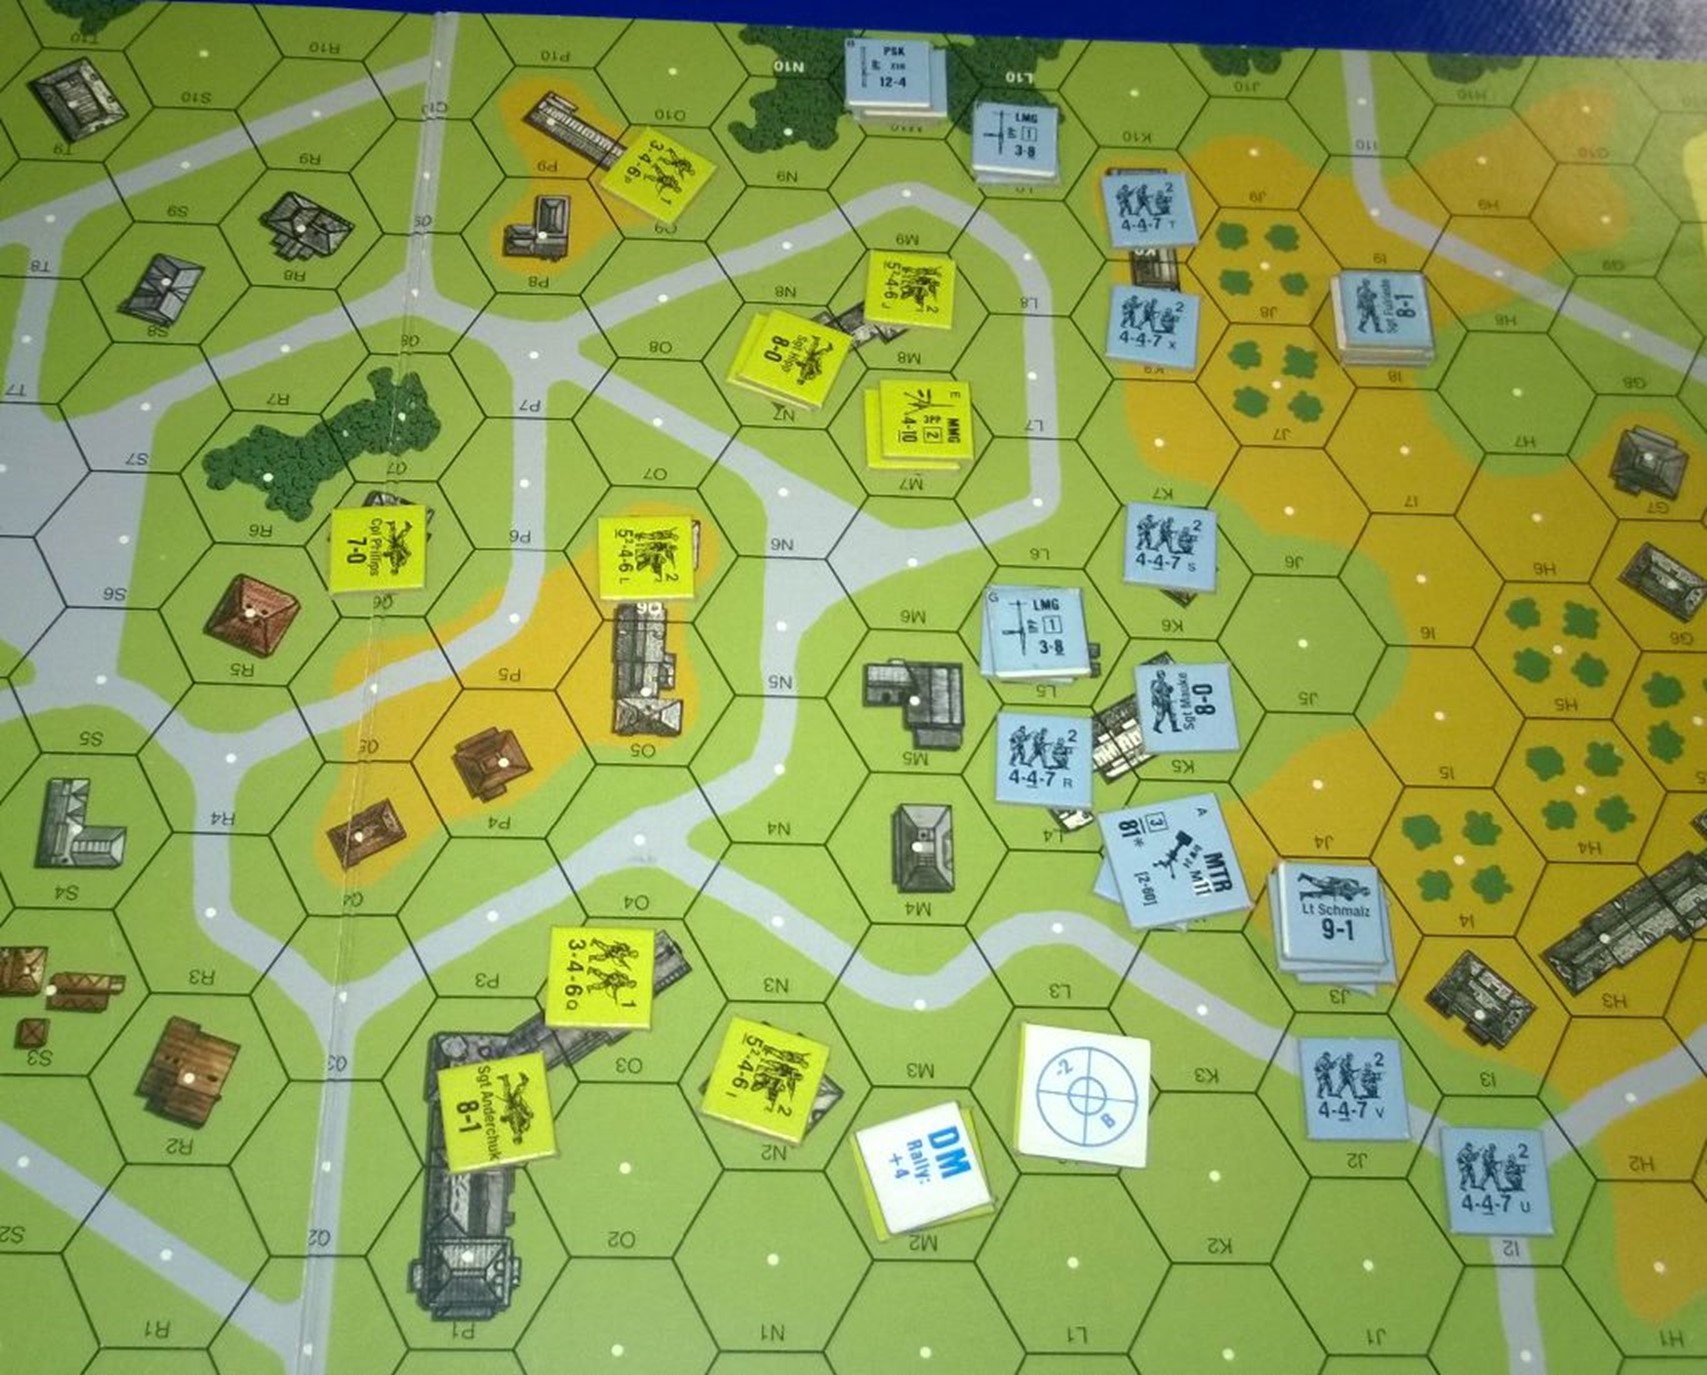
Michael’s firing was more effective than mine and a couple of units, including the PSK-bearing unit, were broken and had to retreat away. Both of Michael’s AT Guns now made an appearance, although their initial firing was ineffective. Luckily for me, one failed to even have any High Explosive ammunition available, whilst the other got only one shot off before running out – and that shot didn’t even hit. That Gun then malfunctioned, as my men rotated their mortar around to properly bear on the AT Gun and the other buildings down below.
I was able to break Michael’s other machine-gun post, and he began to pull his troops back. However, I’d taken a lot of hits getting that far, and now many of my troops were retreating into safety, where their leaders attempted to rally them.
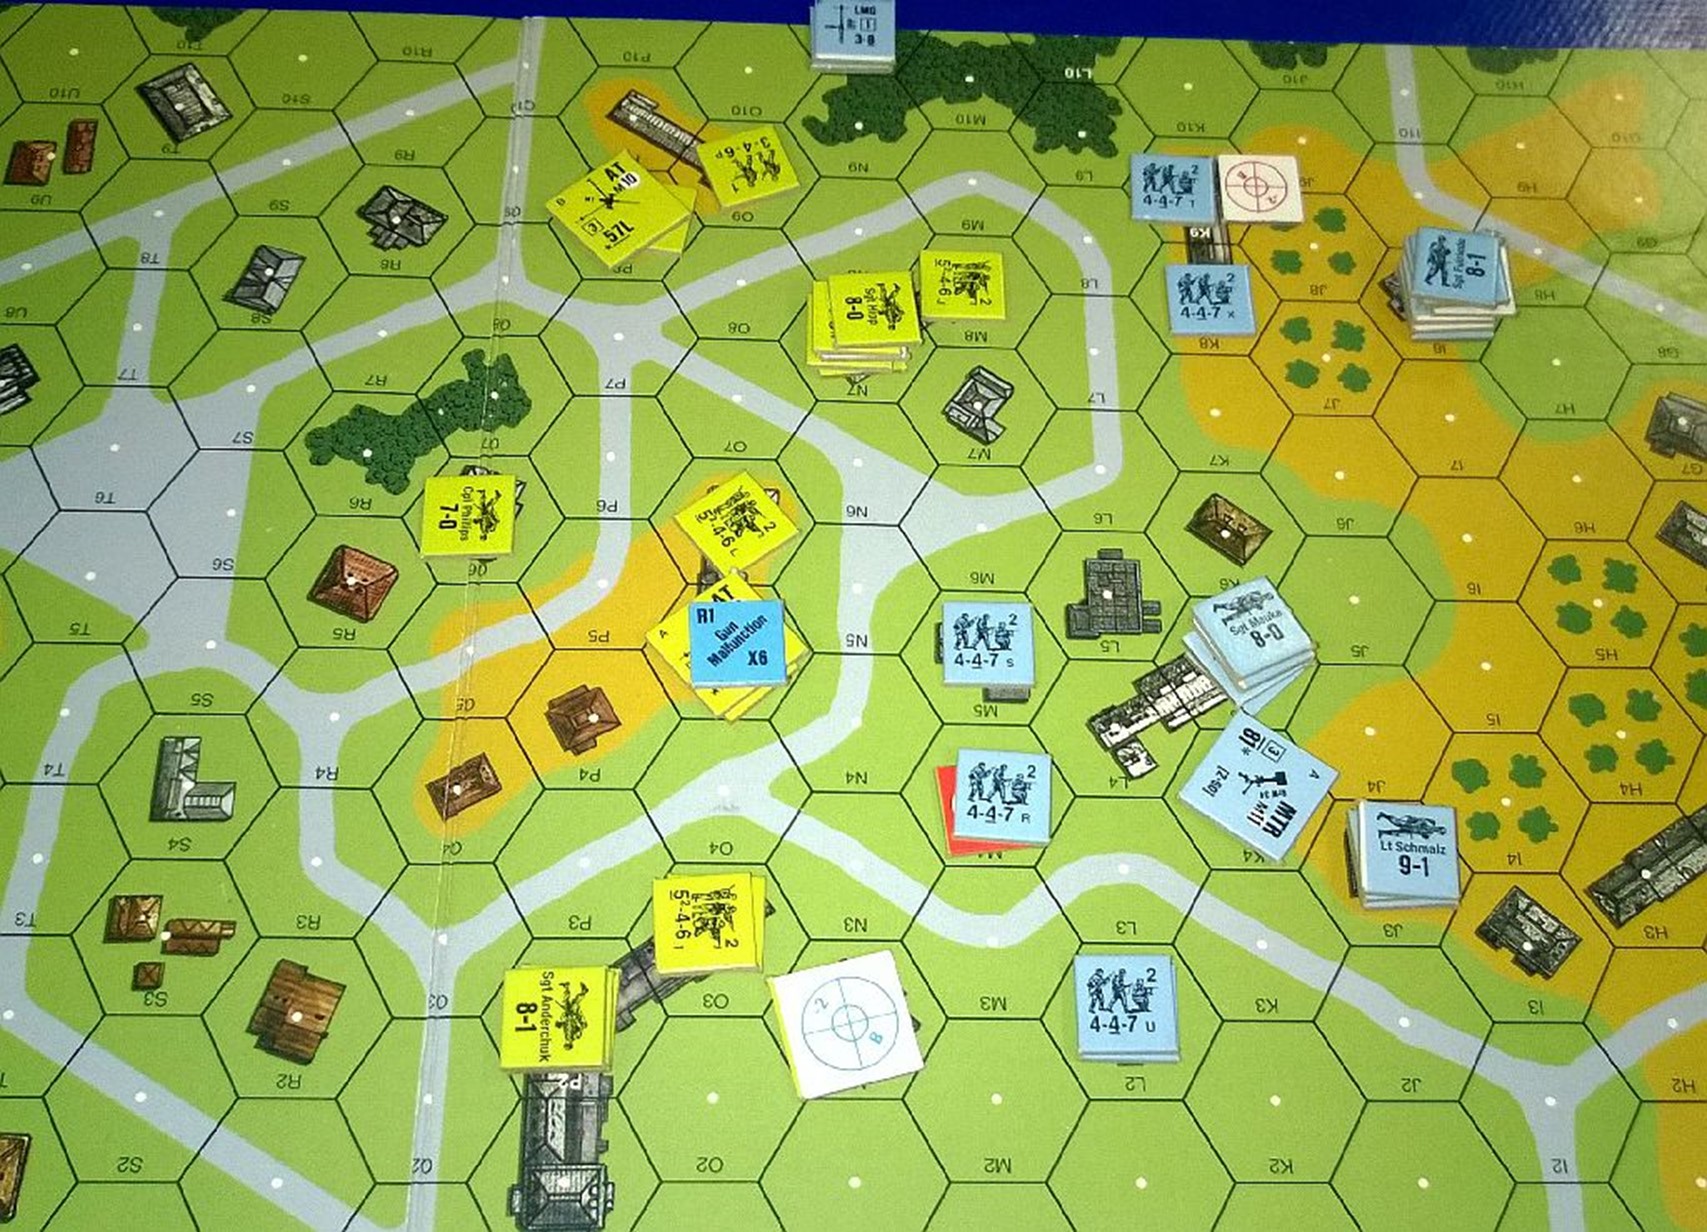
Armour-Piercing shells, which is what the AT Guns were firing, are nowhere near as effective as High Explosive against infantry, but they can still do a fair bit of damage. And the AT Guns have a high rate of fire – Michael would often attack four times in succession as he kept making the ROF roll. Most of the hits would be ineffective, but some were getting through.
My Mortar switched targets to Michael’s AT Gun as his crew repaired it, and broke the crew. Hooray! Michael, meanwhile, took advantage of the Mortar’s shift to move into N2 and deny my men an easy move into the bottom buildings. I began to move my troops aggressively into the open, as Michael’s fire was breaking up my firegroups as soon as they could form, and a lone squad at FP 4 wasn’t having much effect against his squads in their stone building defensive positions.
It was risky, and it had a high chance of not working.
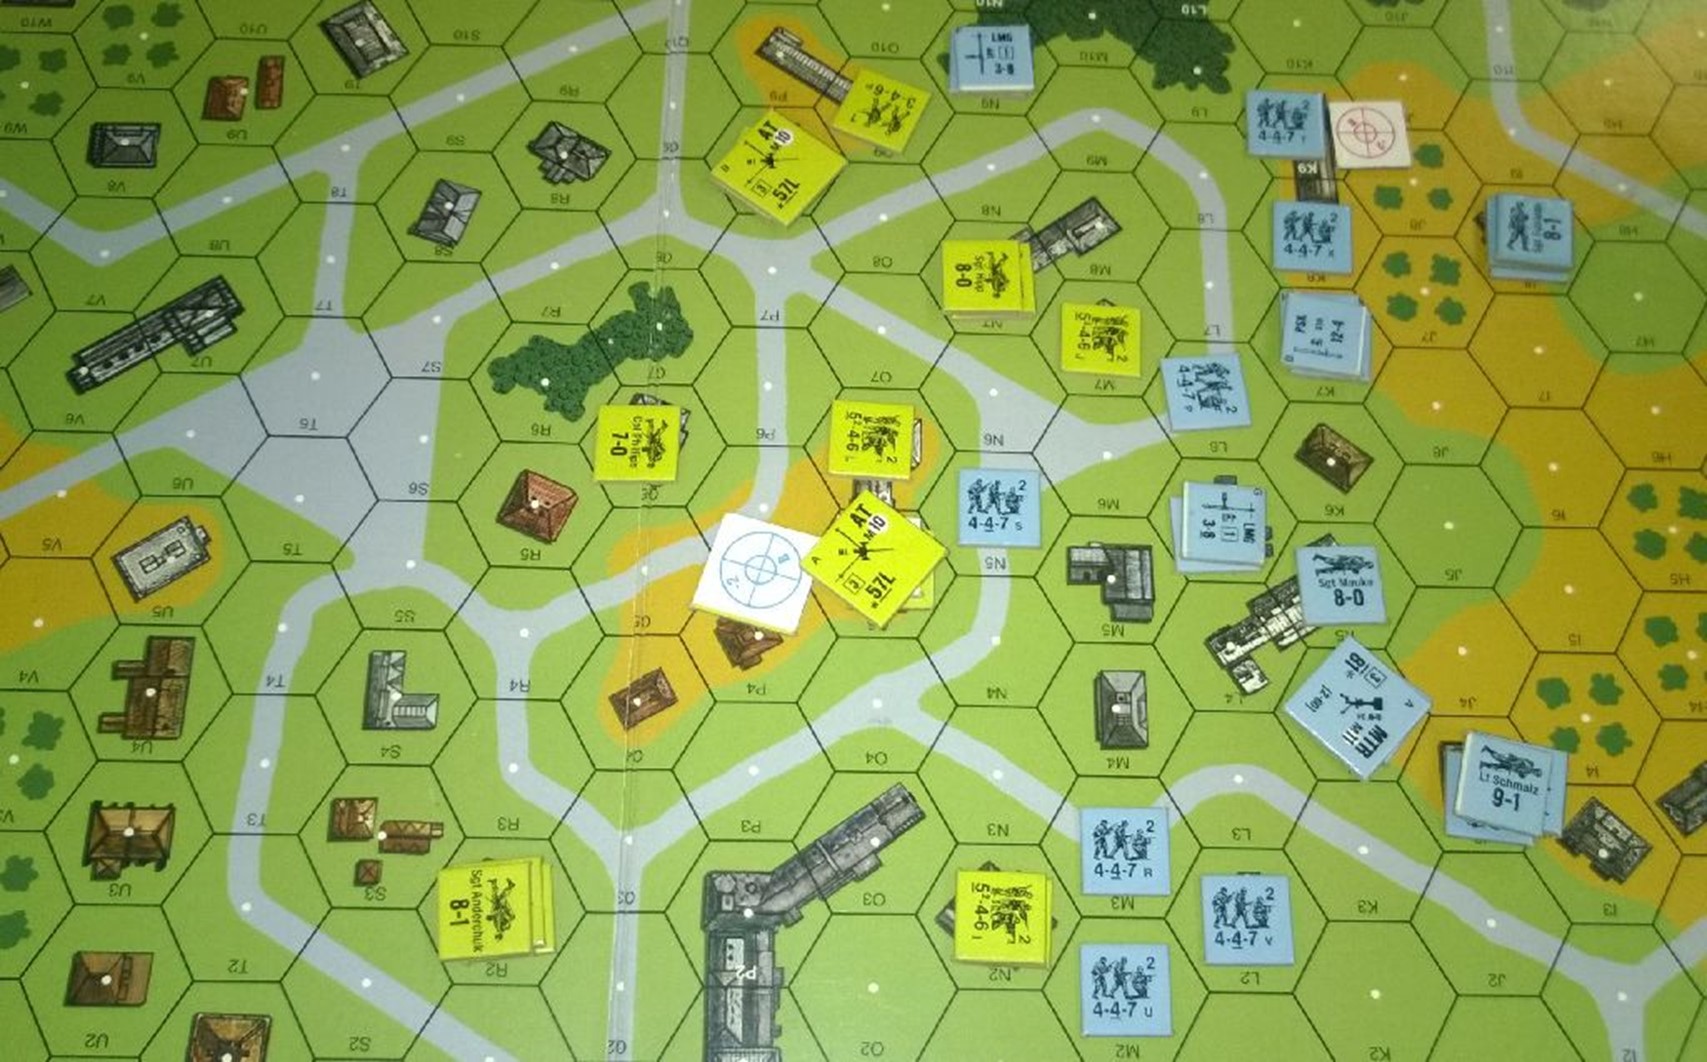
Not surprisingly, it didn’t work. Michael just fired effectively, and my troops became broken. I was hoping that perhaps he’d concentrate fire from N2 into either M2 or M3, but Michael just fired the squad and the half-squad into different hexes, and broke or pinned my units… and my morale checks were not going well. Again, my troops had been repulsed.
At this point, the most heart-breaking event of the game occurred. My mortar returned to attempting to get rid of Michael’s troops in N2, and rolled a double-one: a critical hit! In ASL, Mortars normally are using Area Fire, which halves their effective firepower. So, if I hit I was rolling on the 8 FP table with a +3 modifier (not great odds). The critical hit quadrupled the effective firepower, and reversed the terrain modifier: on the 30 FP table with a -3 modifier! Surely, Michael’s troops were doomed?
Well, the actual effect roll wasn’t so good, but it still provoked a 4MC – a morale check for both units with a +4 modifier. Both units in N2 had a 6 morale. Michael picked up his two dice and proceeded to roll a double-one, and another double-one. Both units became pinned, but that was it. Argh!
Lt Schmalz and his two squads up in J3 finally managed to have an effective roll after that, causing one of Michael’s squads to begin to rout away, but the ineffectiveness of the mortar’s critical hit was so disheartening!

When you got down to it, I’d hardly managed to move forward at all! I’ve a feeling that perhaps my mortar should have been laying smoke, but – given my luck this game – it probably would have run out of ammunition on the first attempt!
Michael’s reinforcements had arrived, and they were now moving towards the village centre, happily unconcerned by the battle raging a few blocks away. Michael, wary of a lucky push from my men, began to drop back squads to hold the village centre, and I moved a little forward to get closer to my goal, but the bulk of my forces were held back by his defiant troops.
Well, my men tried, rushing forward as quickly as possible to attempt to get into melee – or break with advancing fire – the troops Michael had in the village centre. It did not end well. I finally had some luck, and broke a few of his units, but far too late to actually matter.
With the last of the men who could actually reach the centre falling to residual fire, it was time to resign – another convincing win for Michael!
My inability to neutralise his key defensive positions had been crucial, and that had led me into taking risky moves that had just put me further behind. We’re almost finished all the scenarios from the basic SK2 package now, and we’ll side-step into a couple of Operations Magazine scenarios before returning to learning about AFVs in Starter Kit 3. Although I’m eager to get out Decision at Elst, another of my goals is to play through every official ASL Starter Kit scenario. We’ll see how long I can keep it up until the lure of the campaign game kicks in!
This scenario took us two hours to play through.
I really enjoyed reading this after having just gone through this same scenario myself. I like your style, brief, but still with a great overview. Nice pictures. Non-taxing and enjoyable, well done.