
Friday afternoon arrived and, much to my delight, so did Mick. As a result, we were able to play the latest in our series of ASL Starter Kit games. This is our fourth game together, I think. This time we were playing scenario S6, Released from the East, the final scenario in Starter Kit 1.
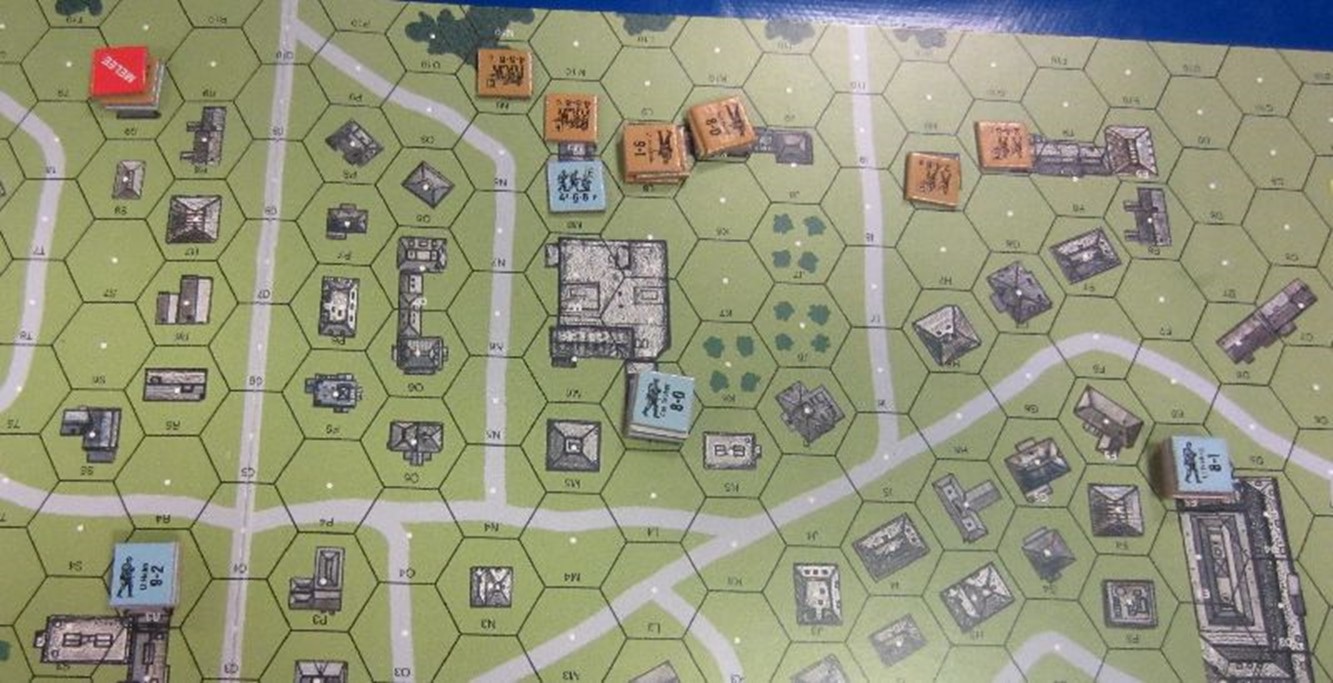
After perusing the scenario set-up, Mick chose to play the Russians, who were attacking the Germans in Istra, Russia in 1941. The Germans had control of three large buildings and needed to retain control of two of them to win, but they had very few units to defend with. Choosing where to set-up was quite challenging. I decided upon two “kill stacks” in the southern-most buildings (on the left and right sides), with further defenders defending the north edge where Mick’s troops would be entering, while maintaining leaders in positions behind the front lines so my units had somewhere to retreat to and where they could be rallied.

Mick’s troops had on winter camouflage, which allowed them to assault move onto open ground and not take the FFMO penalty; he used this to move units adjacent to my forward squads. I fired upon them, defensively, and rolled horribly, inflicting no damage. Secondary fire in the Defensive Fire round was no better, and so Mick was able to fire in the Advancing Fire phase when adjacent – this wasn’t how it was meant to start! He advanced into melee on the left and right, and one group continued to fight whilst my other unit was eliminated. And, a very lucky hit broke my 8-0 leader in the central building, who retreated to a safer place.

The paucity of my number of units now became quite apparent as Michael was able to swarm towards my front lines; my rolling remained poor and I wasn’t able to inflict casualties even against units in Open Ground. Mick had also detached a section of his troops before play began; they’d be entering on the east side at the beginning of Turn 3. I was feeling considerably worried about my position.
My units continued to break before Mick’s attacks, and my 8-0 leader rallied as troops from the front routed back towards him; it didn’t help that my latest point-blank shot against a unit advancing in open ground was another 11 – by this time, I was wondering if the dice were cursed.
Mick had trouble deciding what to do with a couple of half-squads, so they just durdled around for a few turns.
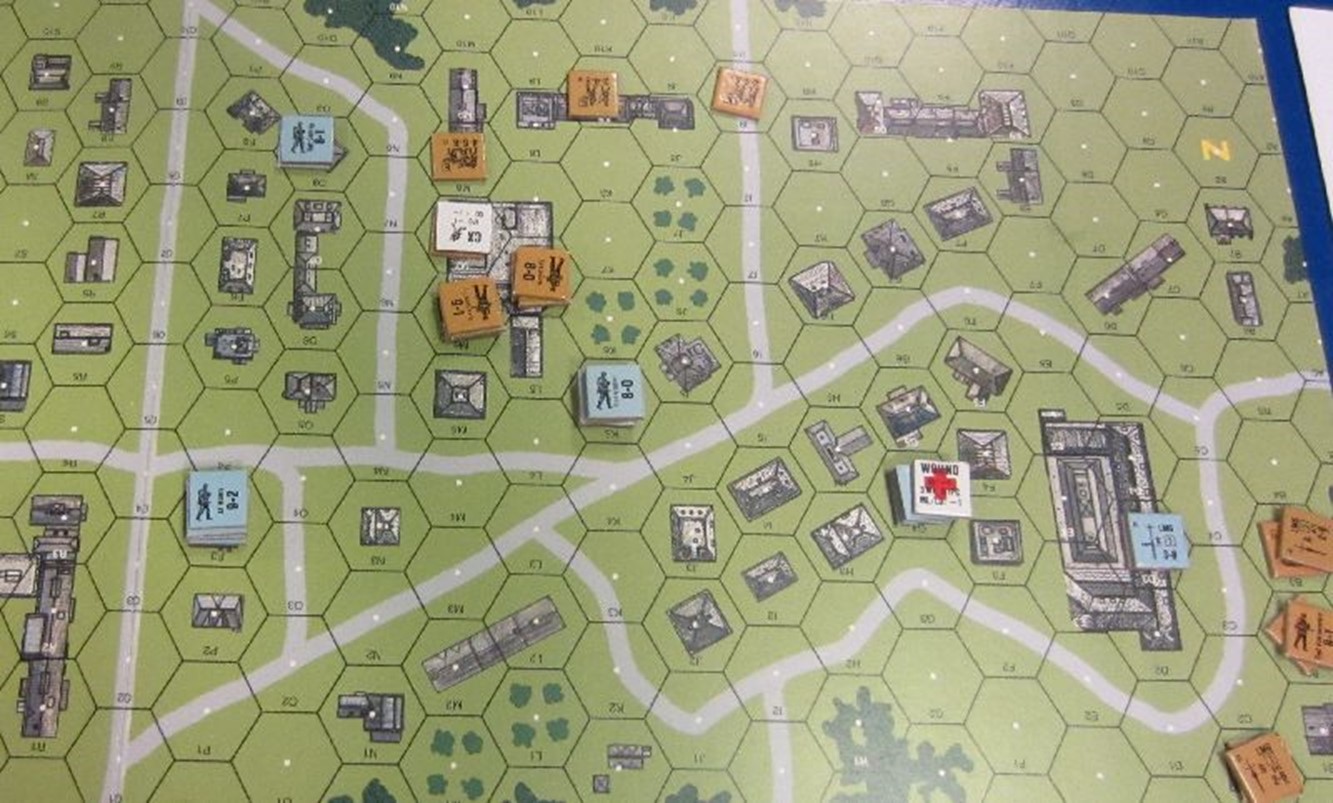
Mick’s reinforcements entered the map, and stared across the road at my troop in the large building across the street. And then he made a low-percentage shot and broke my leader whilst another of the units suffered casualty reduction due to Fate. With his other troops streaming through the middle building, pushing my defenders out before them, the game was looking very poorly for me. At least I won the melee in the top-left corner, even creating a 8-1 leader to help in the cause. Unfortunately, I was down to a half-squad there.

I tried to bring my new leader down to aid in the fighting, but with only a half-squad, he wasn’t really likely to do any effective attacking. Locking up my opponents in melee seemed the most likely option, but getting him across the street seemed difficult. Fate took a hand in my attempting to gain the upper hand on the right-hand side of the map, and my 8-1 leader there suffered a wound when trying to rally, making him effectively 7-0. Despite the SSR giving me a +1 broken side morale for my squads, rallying squads under DM was still very difficult, and so I abandoned the central building, hoping to get enough respite to rally my troops. Mick wasn’t about to let that happen!
Realising that the left-hand building was now basically safe, I moved up the machine-gun nest there to R4, hoping to inflict some casualties on the forces in the central building, allowing me to retake it.
My wounded leader rallied, and Mick began to move up on the right-hand building (D3); my defensive fire was finally somewhat effective, and I broke one of his units. Against the squads in the central building, the best results I was getting was PIN results as we continued to exchange fire for little effect. As Mick brought up his units around the south of D3, my light machine-gun malfunctioned, and my squad broken and routed away to the nearby leader, leaving the building empty.
Attempting to cross the street to the central building, my leader and half-squad came under withering fire… from Mick’s half-squad. It had a 2 FP, but I was still broken, and the leader rolled a 12 on his Morale Check to suffer a wound! Two wounded leaders… this wasn’t going well at all!
For a short while, I reclaimed building D3, only to have the Russians attack once more and force me out. Mick brought up his MMG to attack my remaining forces, and the game slipped away.
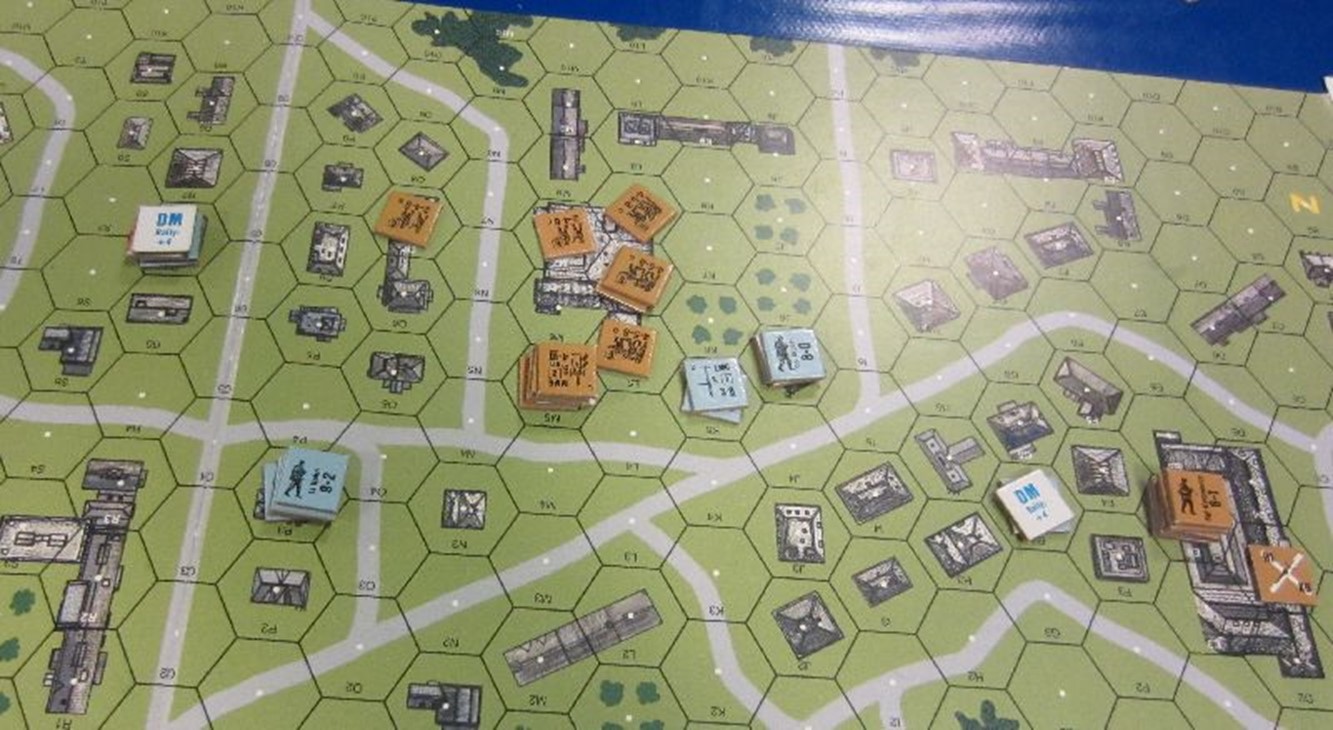
It was the fifth turn of the game, and my last turn; the Russians had an additional turn after mine to seal the game. The central building was swarming with Russians; I had no hope there. The left-hand building was solidly mine with units protecting it; that seemed likely to be held. It was the right-hand building that could be recaptured, but I had very troops available to do it – they’d have to double-time over there and even then hope on some good advancing fire or melee rolls.
My machine-gun post attacked Micks, and broke one squad there, but his MMG squad remained unbroken. Crap. Now I had to run my one squad through the MG fire along the road. As expected, Mick rolled well and it broke under the hail of bullets. That left a particularly unlikely win if I could get my 8-0 leader into melee… (yes, I don’t think the odds even allowed it). I was going to try, though! It reached the building adjacent to Mick’s troops… and was pinned.
Well, that was that!

For obvious reasons, we didn’t play through the last half-turn; Mick had this won, and there was nothing I could do to claim the victory.
As far as an example of how to competently run a defence in ASL, I urge you to look elsewhere. My efforts weren’t helped by some truly awful early rolling – against Mick’s advancing forces, in open ground and at point-blank range, with effective firepowers of 8 and 12, the lowest I managed to roll was a 9. Mick’s forces laughed at my forces puny efforts, and then destroyed them!
Once Mick had the advantage, he didn’t let it slip – he had enough forces to easily take the two buildings, and my best troops were too far away from the action.
The game took us about 80 minutes to play, which is pretty good going. My next match will likely be scenario S7, the first of the magazine scenarios for the ASL SKs.