
Operation Market Garden. It’s a legendary operation, although possibly legendary for all the wrong reasons. The idea – capture a lot of bridges simultaneously with paratroopers, and drive up the length of a long road to gain a “back door” into Germany – sounded great, but actually pulling off the operation required entirely too many things to go right. And things, it turned out, could go very wrong for the Allies.
So, it’s the 17th of September 1944. This scenario deals with the part that some of the soldiers of the 506th Regiment played at Zon in Holland, including members of “Easy” Company – the Company portrayed in Band of Brothers. Michael noticed that connection before me, and was quite interested as a result. And then he played the Germans!
This is the first scenario in the Starter Kit series to allow the Guns to be set-up using HIP – Hidden Initial Placement. In other words, I didn’t know where they were!
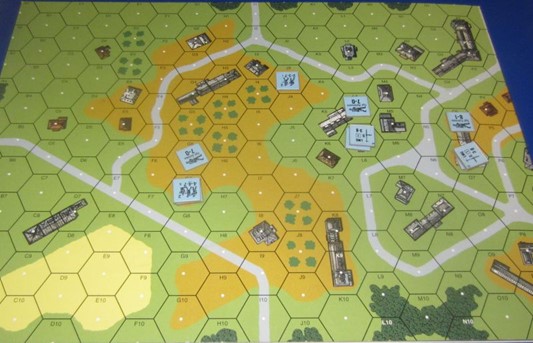
My objective here was to enter my men from the bottom of the map and take them off the top; I needed to get 7 VPs worth of them, which is basically 3-1/2 squads. Michael set up his troops excellently, covering the main fire-lanes of the lower village, and making it very hard to cross the hill. His leaders were not in the same hexes as his units, but one hex back in a building. In addition, he’d stacked two squads to a hex in a couple of key positions, giving him potential “kill-stacks”.
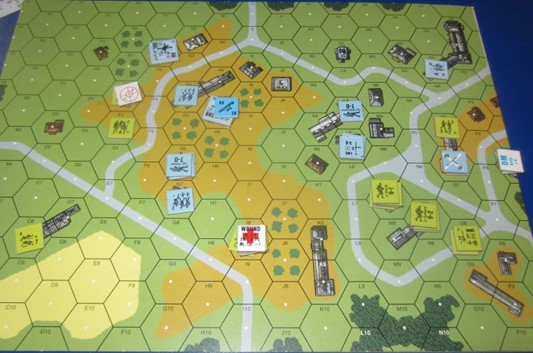
My initial entry was of only four paratrooper squads (7-4-7), one Bazooka and one leader, on the left side of the bottom edge. This was tricky – what was the best way of proceeding? My solution was to send three squads towards the building on the left near the field, whilst the last squad and its leader climbed the hill and entered the building there.
It really didn’t go well. Actually, it went astonishingly badly. I also found out where the first of Michael’s AA Guns was – in the orchards on the hill – as it completely demolished my poor squad and leader. What was worst about this? My first three morale rolls were double-sixes… two casualty reduced squads became half-squads, and the leader was wounded. Oh, boy!
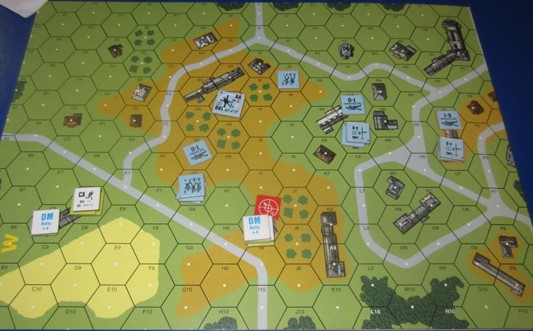
I did have a couple of squads (exhausted, but okay) that had made it to the building near the field, but Michael’s Prep-fire phase broke one of those remaining squads, and although 7 FP is good, it wasn’t enough to dislodge Michael’s kill-stack from his hill-top building.
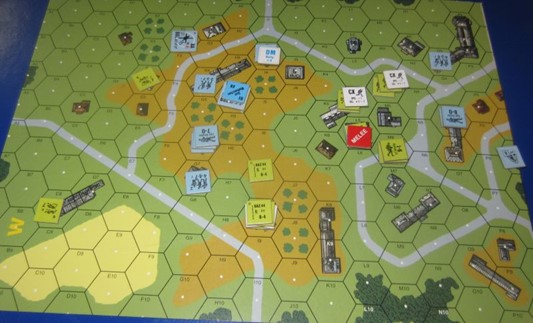
The bulk of my forces now entered from the bottom-right: seven squads, bazookas and some very good leaders. I happily climbed a number of them onto the hill to the far-right, setting up positions where they could get rid of Michael’s kill stack in the right-side hill.
At this point, Michael reminded me (in force!) that the hill was in line of sight of his 88.
This wasn’t going well. At least one of my broken squads on the left managed to self-rally. Michael continued to press his advantage, keeping my units beneath Desperation Morale counters where possibly, and breaking new units where it wasn’t. He could do this all day!
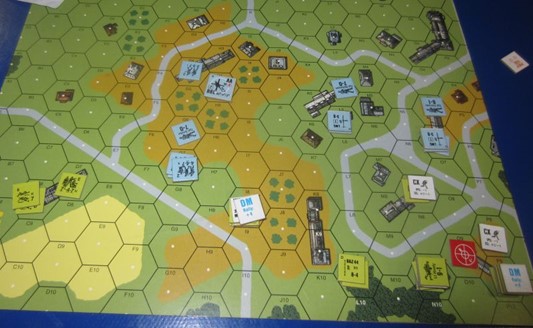
I couldn’t. I needed to press my units forward. I used smoke grenades where possible, and pressed forward. Prep fire managed to break several of Michael’s units – at last – and I took the opportunity. Running two squads up the left side of the central hill, I also discovered where Michael had placed his second 88 Gun. Urgh.
I finally had a bit of luck as Michael’s first 88 Gun malfunctioned. I now pressed forward with my troops, taking as much ground as I dared and skirting my 3-3-7 half-squad around to rout Michael’s broken leader away from O6; I did have another option with that half-squad, and that was to keep his fleeing conscript squad under DM. I chose to rout the leader. This would come back to bite me.
I still had time to win this scenario, but it was going to be close. It was not helping that Michael’s forces were proving stubbornly difficult to dislodge.
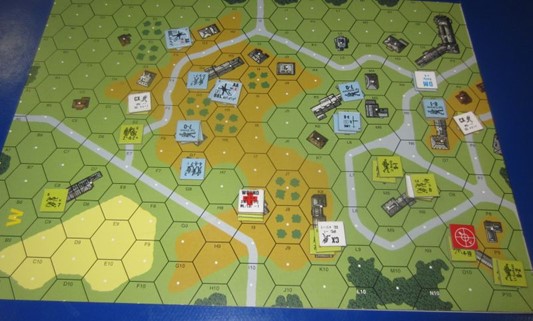
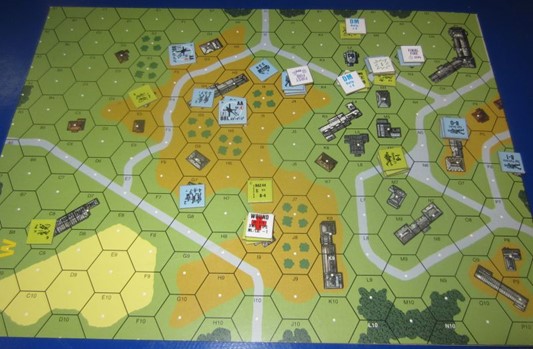
My best chance came when I was able to break the crew manning the still-functional gun. The squad that managed that ran forward and escaped off the map – I’d gained 2 VPs! In the lower town, using smoke I was able to get my units up into the central clump of buildings, moving into melee with Michael’s squad there. On the right, Michael moved into close combat with my half squad, and we both took casualties: he was reduced to a half-squad and my troops were eliminated.
Unfortunately, Michael’s shooting was pretty accurate against my bazooka-carrying squad that had reinforced the centre. As a result, I couldn’t exert pressure on that hill.
And Michael’s conscript squad rallied… in the perfect position to attack my squads as they attempted to escape the map.
What did I need? The main one was to self-rally the squad in E4. This would make my task a lot easier. It didn’t happened. Michael ran his squads across the map to look down at my troops running across open ground towards the bridge that was their target (off the top edge of the board).
I almost made it! My best leader and his squad survived three fire attacks, and were almost off the map, when Michael’s conscripts opened fire. And, to end the game where it began, my 9-2 leader rolled a double-six for his morale check and was eliminated. I still had a chance, even then, but none of the following squads could survive even the residual fire. With only one squad and leader to go, it was now mathematically impossible for me to win, and I conceded. In the distance, the Germans blew the bridge.
Historically, Dog and Easy companies were able to clear out the 88s, but not quickly enough before the Germans blew the bridge. A temporary bridge was rigged up by the engineers, until a better bridge (a Bailey Bridge) could be brought forward by the British. This was a very enjoyable scenario, despite my loss. It certainly kept me on my toes!
In other news… the ASL Starter Kit Historical Module, Decision at Elst has arrived! At some point, I expect Michael and I will tackle that, although not for a month or so. First we need to get comfortable with tanks!